One Stop Lighting
MENU
  • Buying Guides
  • Styles & Trends
    • Bathroom Lights
    • Ceiling Fans
    • Ceiling Lights
    • Lamps
    • LED Lights
    • Outdoor Lights
    • Smart Lights
    • Wall Lights
  • Wellness & Safety
  • Shop Products

5 Lighting Design Rules: Keepin’ it Lit!

Whether you’re interested in designing a new space or upgrading your current one, there are some very important lighting design ideas to keep in mind.

Lighting can be the make or break of a beautiful, efficient, and functional space that you will either want to spend all your time in or be dying to get out of.

If you follow these simple lighting design rules, you’re sure to create an environment that you love and that is best set up to make your life a lot brighter!

If you’ve ever started from scratch with any type of design, it can be a little daunting. We suggest thinking about lighting as part of your entire design instead of adding it in as an afterthought.

When great lighting design ideas are implemented in a home, office, or other space, it can actually make a huge difference in the health and happiness of an individual or family interacting with it day in and day out.

If you’re interested in rehauling your lighting situation, follow these 5 simple lighting design rules to keep your spaces lit!

Get Lighting Design Tips

#1:  Know Your Room:

Designing a lighting plan for different rooms requires completely different planning and implementation.

Consider what the most important thing you will be doing in this particular room is. Is it a space for sleeping, relaxing, or productivity? This is the first step to finding great lighting because once you know what you want out of your space, you can learn how different lights will help you optimize it for that function.

For instance, bright white and blue lighting is actually great for energizing a person to reach full efficiency and get more done.

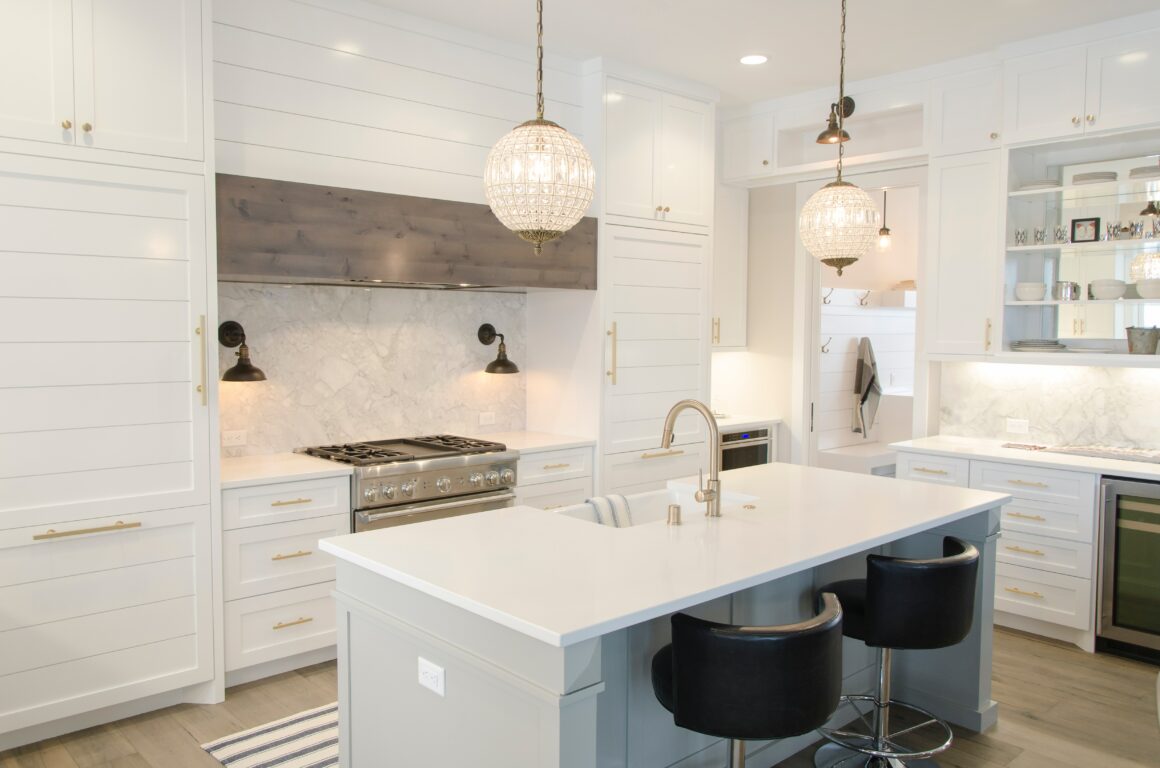
Offices, kitchens, and creative spaces are great places to utilize blue lights. However, if used too late in the day, blue light can continue to keep you awake when its time to hit the hay.

In your bedroom, warm lighting and candles are far better suited for relaxation and good sleep.

If you think lighting design is entirely about which lamp most beautifully fits the aesthetic of the rest of your interior design, you’re missing the mark.

Light is a crucial component of any design. So when you’re planning your room, think about what you need it to do for you. Simple as that. Then you can begin searching out lighting design ideas that will make that plan a reality.

Find the Perfect Lighting for Your Room

#2: Functionality Comes First

There’s nothing more frustrating than living or working in a space that just doesn’t make sense… even if it’s beautiful. Your lighting design should always put functionality first. If you’re looking in the right places, you can still find a beautiful fixture to fit the function you need.

This applies to main lighting as well as the smaller details. Think of workspaces like countertops and bathroom vanities. Adding lights under cabinets or over mirrors will make a big difference in not only adequately lighting your space but ensuring your space is functioning the way you need it to.

All this is to say, don’t get too caught up with the look of your lighting before you think about the purpose it’s actually serving. We’ll get to the pretty stuff soon, don’t worry.

Shop our Lighting Clearance Sale!

#3: Mimic the Pattern of the Sun

This one may not make sense without a little bit of explanation:

Sunlight affects your body’s natural circadian rhythm by telling it when to wake up, when to be at full efficiency, and when to wind down.

This is why getting natural sunlight in the morning and afternoon is great for productivity and positivity! However, different color temperatures of light can actually mimic this to make sure your circadian rhythm isn’t thrown off by harsh or inappropriate lighting for the time of day you’re using it.

Sunlight follows a pattern throughout the day, changing from warm tones of the sunrise, to bright white lights midday, finally into dims and warmer tones in the evening. Color temperatures (measured in Kelvin) represent these different tones of light.

Your lighting design ideas should mimic the sun by utilizing different color temperatures at these different times during the day to help your body naturally function the way it was designed to.

Lighting between 1,500 and 2,700 Kelvin is similar to a sunrise and helps you more easily wake up and transition into go-getter mode.

The afternoon is all about bright, white overhead lighting between 3,000 and 4,000 Kelvin to keep energy up and productivity at an all-time high.

Finally, use warm, dim, lower-than-eye-level lamps and wall lighting fixtures in the evening to copy the cozy sunset feeling.

Learn About the Impact of Healthy Lighting

#4: Get Creative

Lighting Design Ideas

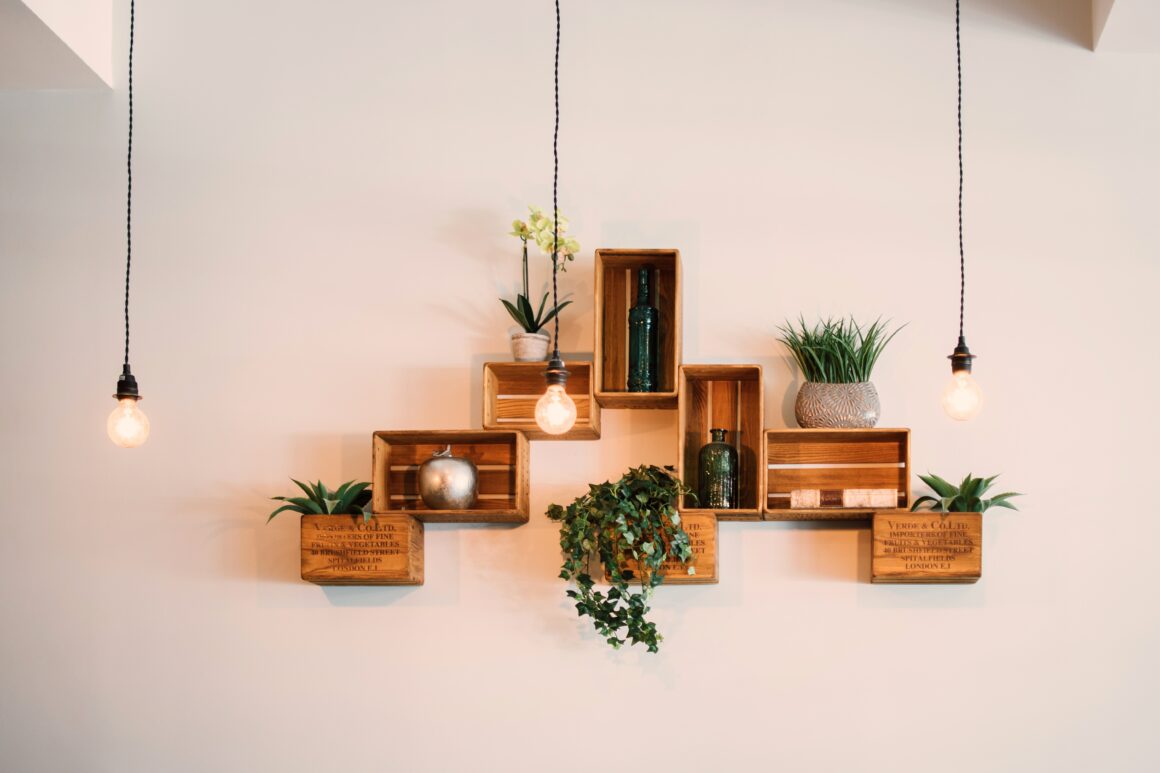
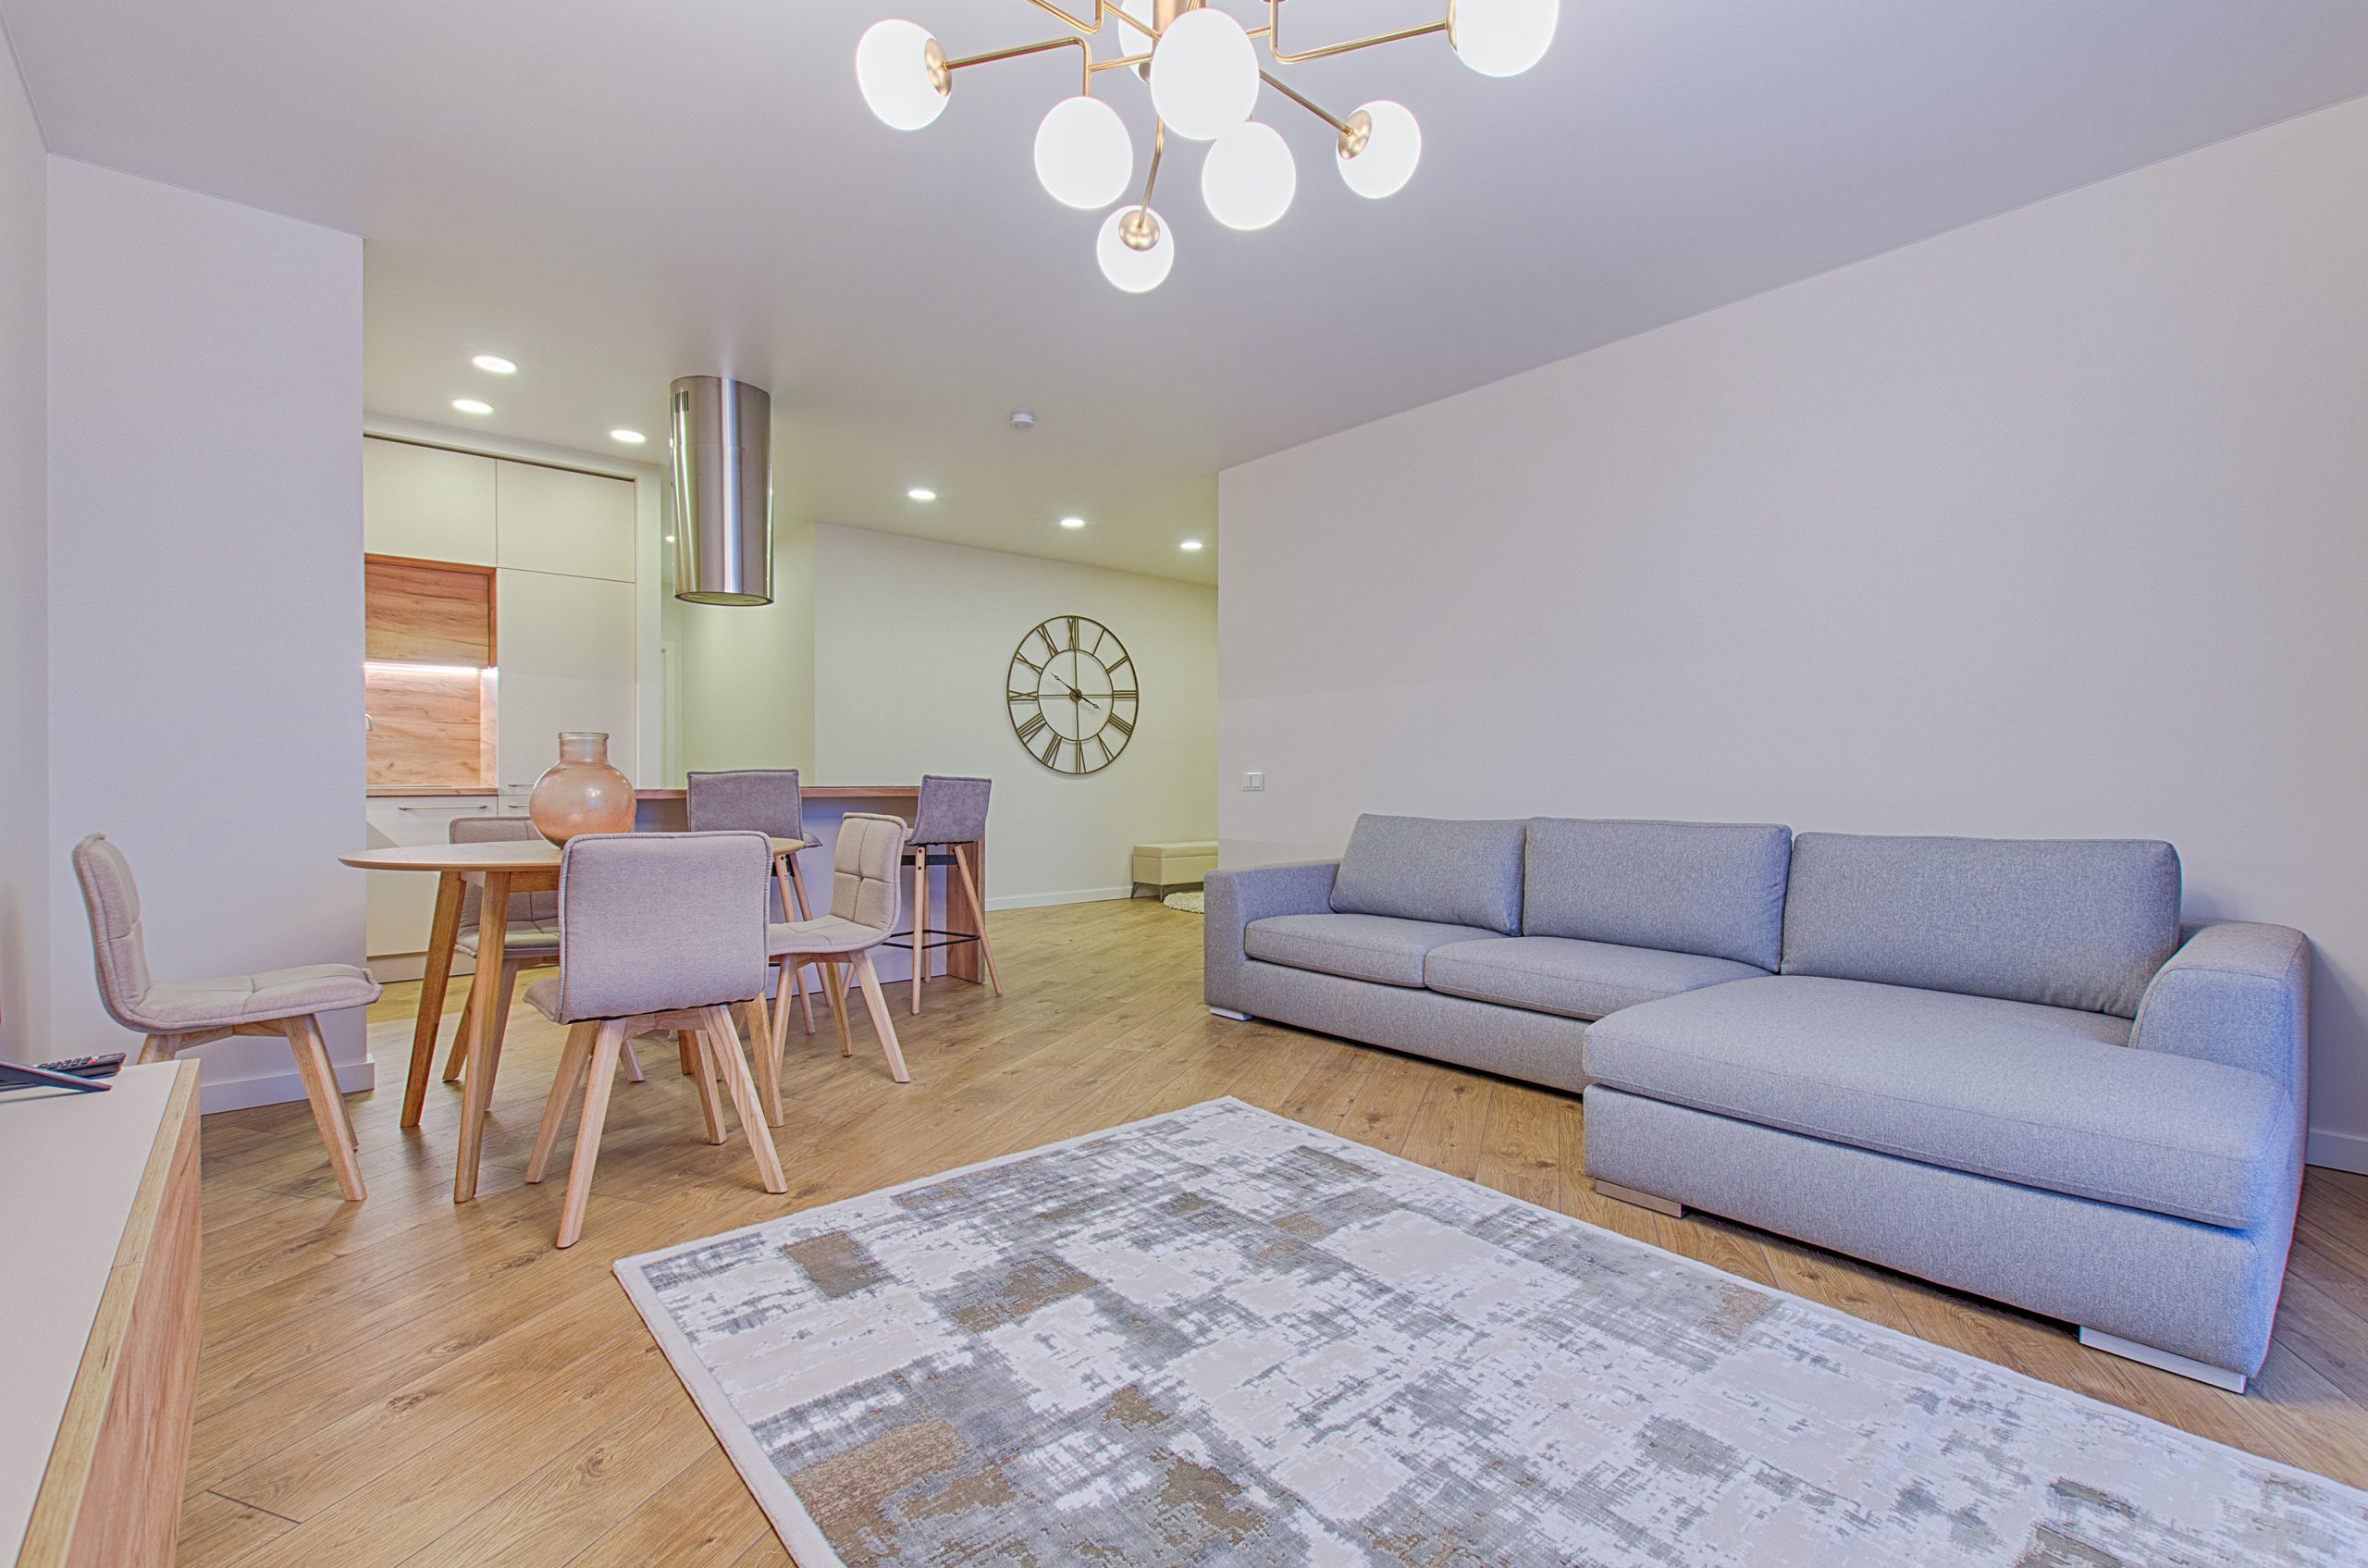
Great lighting design ideas include so much more than just overhead lights. Think chandeliers, pendants, spotlights, floor lamps, fairy lights, votives, and more! A great lighting company will have gorgeous lighting fixtures that still check all the boxes of the aforementioned.

Especially when it comes to task lighting, and evening mood setting, overhead lights aren’t the best at getting the job done.

Think outside the box with many different types of fixtures that are all working together to fulfill that larger purpose you established. If this seems overwhelming to you… well, let’s move on to step 5!

Browse Lighting Options Now!

#5: Ask Questions

Coming up with Lighting design ideas can be fun and exciting, but can often become stressful when you don’t know what you’re doing. Moreover, it’s possible to buy a bunch of lights that don’t end up working together or fulfilling your ‘functionality first’ intention.

There is no shame in asking for help. Professionals can help you make your vision a reality while ensuring your lighting design ideas are actually efficient and effective at appropriately lighting the most important areas in your life!

————————————-

If you’re located in Utah, Hansen Lighting has friendly lighting professionals to help you do just that. They are able to help you balance your lifestyle with your aesthetic style to beautifully light your home or other spaces.

Hansen Lighting follows the Danish principle of Hygge which is a way of utilizing your spaces to make them cozy and comfortable. By optimizing your lighting, you can actually improve the overall health and happiness of those living in your home.

Hansen Lighting is the perfect place to turn your lighting design ideas into reality. Start with a wish list of your favorite beautiful fixtures. Then, visit an experiential center in Utah to see Hygge lighting for yourself and hear from a pro how to utilize it in your home.

Visit Hansen Lighting Today!


12 Simple Bathroom Updates You Can Do Yourself

Bathrooms are spaces that often go overlooked, but when they’re spruced up, they add some serious value to your home! Remodeling can take loads of time and effort (not to mention money), but giving your bathroom a facelift doesn’t have to. These simple tips can give you the bathroom of your dreams.

1. Organize

The last thing you want to deal with at the beginning and end of your day is CLUTTER. Give yourself the gift of a good system! Containers may seem unnecessary, but when you’re rushing out the door, it saves you a headache to just have an easy home for all your toiletries.

2. Add Greenery

Plants bring life, peace, and tranquility into a space. This bathroom would be the perfect escape from the stress of everyday life. The warm tones mixed with the green tell you to relax and take a break. Who are you to tell them no?

3. Change the Hardware

Arguably one of the easiest ways to take your bathroom from the early 2000s to today without spending a fortune is changing the hardware on your cabinets. Finish options are endless! The bathroom above uses gold accents to create a cohesive look with a modern feel.

4. Spruce Up the Walls

If you’re looking for a simple way to make a big impact in your bathroom and have a free weekend coming up, a fresh coat of paint and some elbow grease will make your bathroom feel like a brand new space with just a few hours of work! 

Want to take it to the next level? Bold wallpapers are in, and they really let you show off your personality! This bathroom incorporates the best of both worlds with a simple, painted board and batten wall on the bottom and wallpaper on top! It’s not as hard as it looks – check out this quick tutorial!

Renter-friendly option: Removable peel and stick wallpaper will give you the same look without having to commit long-term. Love the board and batten? There’s a renter-friendly tutorial for that too!

5. Update Mirrors

Bathroom mirrors are often neglected, but they totally change the feel of the room – don’t leave them out! These wood-framed mirrors bring warmth to this bathroom’s design and help to balance out all of the cool tones and polished finishes. 

Renter-friendly option: If replacing your mirror is out of the budget or you’re renting, adding a wood frame to an existing mirror is an easy one-weekend DIY project – just make sure you can easily remove it if you’re renting!

6. Paint Your Cabinets

Painting your bathroom cabinets may take a little effort, but it’s a great way to unify your space or to add a fun pop of color your bathroom. With just a small can of paint and some time, you can take your bathroom from basic to beautiful, even with a low budget. This bathroom’s painted cabinets help to ground the space, and provide much-needed contrast that takes the design from bland to balanced.

7. Replace Old Light Fixtures

Replacing a ceiling or wall light in your bathroom with a modern fixture that’s more your style will give the entire room an instant style boost! You don’t have to play it safe here – find a fixture you love and jump in! We love the way this bathroom shows some serious creativity with these pendant lights that highlight this AMAZING wood accent wall. 

Many homeowners are wary of swapping out light fixtures, but it’s usually a pretty simple DIY. We recommend starting with your vanity light first if you’re on a budget – great front-facing light by the mirror will make the biggest impact on your morning routine!

8. Layer Your Light

Every room in your house should have several light sources to make it feel more comfortable and eliminate harsh shadows and dark corners. In a living room, that’s as easy as tossing in a few lamps, but layering light in a bathroom can be a little trickier.

This bathroom uses a combination of pendant lights and recessed lights to make the whole space feel bright and airy. If your bathroom lighting isn’t working for you, installing an extra wall or ceiling light is the best way to go from dark and dingy to light and bright. 

If your bathroom’s already finished and rewiring isn’t in the cards – don’t worry! Fortunately, there are a lot of easy do-it-yourself options out there. 

LED light strips like the ones in this bathroom are inexpensive and as easy to install as a sticker! They’re usually used behind the mirror or under cabinets, but they can go anywhere you want some extra light. 

You can also replace a light switch or outlet cover with one that has a built-in light – no more blind fumbling for a switch in the middle of the night.

Renter-friendly option: Get a motion-sensing plug-in outlet light or a rechargeable countertop light! These are both non-permanent ways to add a layer of light and keep yourself from bumping into the counter in the dark.

9. Update Faucets

Another way to update the look of your bathroom and conserve water is by switching out your faucets. Look for a faucet with a WaterSense label to reduce your sink’s water flow by 30 percent or more. Less water flow means a lower water bill. With a lower water bill, you’ll have some extra change in your pocket to take your family out for dinner (or yourself–you deserve it!).

10. Dim the Lights

The lights in this bathroom make it a retreat from chaos. When you want a calming bath, dim the lights for optimal relaxation. Dimmable lights give you the flexibility to turn your bathroom into a spa.

Bonus points: Since dimmable lights are more energy-efficient, installing a dimmer switch will leave you with extra money to do more with your bathroom!

Renter-friendly option: Use other lower-light options like strip lights, countertop lights, or LED candles like in the bathroom above.

11. Add a Backsplash

The metallic accents and painted vanity in this bathroom are to die for, but what really makes this space magic is that classic backsplash. Not only does it breathe new life into this space, but it also protects the wall from moisture and staining, so you won’t have to worry about mold or mildew. With a little DIY magic, this bathroom feels complete!

Renter-friendly option: Use a peel and stick backsplash instead! It’ll look like tile without actually being permanent.

12. Update Your Tile Floor

While tile may be a bigger time or money investment, this bathroom clearly shows that it pays off. If you’re wanting to update the floor, choosing a unique tile like this is the way to go. Pro tip: while real tile will give you the best result, you can actually use a stencil to paint your floor. It will give it the same look for a fraction of the cost!

Renter-friendly option: Use removable flooring (peel and stick) to look like custom tile, or cut a vinyl piece to fit the size of any existing tile.

————–

Don’t let your bathroom fall between the cracks any longer! When you’re ready to take it to the next level, give our experts at One Stop Lighting a call. We’d love to help you get started and give you more tips like these.

5 Tips to Create the Dreamiest Porch

The front porch is an often overlooked space which is, in our humble opinion, a shame. A cozy front porch is a perfect refuge from any inside chaos. It’s the first thing a guest sees and a private place for an intimate conversation with a close friend or family. Here are some tips to help you create the front porch you’ve been dreaming about:

  1. When in Doubt, Add Plants
  2. Let Your Door Speak For Itself
  3. Lighting, Lighting Lighting 
  4. Less is More!
  5. Pick Comfortable Seating

1. When in Doubt, Add Plants

One of the simplest ways to level up your porch is to add some plants and flowers. Choose real plants if you have the time and motivation you to keep them alive or, if your thumb is less-than-green, just stick with faux. Either way, a little bit of green adds a lot of life and color to a house!

Throw a couple of potted ferns like these on either side of your door to add a touch of green without going overboard. Simple, but effective.

Look, we know not every house is blessed with beautiful draping greenery like this one, but who could resist this Secret-Garden-like oasis? If you’ve got a green thumb, this front porch is one to aspire to.

Flowers

If you want to turn the head of any passerby, flowers are the way to go. They add a pop of color and are a guaranteed way to brighten everyone’s day!

Potted flowers are a good solution if you have a minimal front yard or no flower beds. This porch’s flowers are to die for, but you don’t have to have this many for a stunning result! Even tossing a couple of pots next to your door can add vibrance and life.

Hanging flower baskets are a classic way to add some dimension to a porch. Choosing to hang flowers instead of having them on the ground can also save space so you won’t have to sacrifice the porch set you’ve had your eye on.

2. Let Your Door Speak for Itself

You can do a lot to dress up a front porch, but if the door is lackluster, you’ll be hard-pressed to make the rest of the porch shine. Whether you paint your door, replace the hardware, or replace the whole door with something more your style, don’t forget to give it some TLC!

Whoever picked the color on this door should be given an award! This minty green pops against the red brick, and the gold hardware ties the whole look together.

A simple wooden door can bring warmth to a neutral-painted house like this one. We love how the sconces match the hardware on the door of this home to create a cohesive look. Even the smallest detail is accounted for and we’re impressed! 

3. Lighting, Lighting, Lighting

Lighting is a simple way to take your porch to the next level. There are tons of options to choose from, but two of the most common (and effective) front porch fixtures are sconces and pendants. If you have a larger porch, you should also look into recessed lighting to give you more light.

Sconces

A sconce is a wall-mounted light fixture that’s often used next to or above the front door. Picking the right ones for your house makes a big impact on your porch’s aesthetic and style. Check out how well these homeowners did!

These sconces have a rustic feel that contrasts beautifully with the white siding. They give this home just a spritz of farmhouse!

This sconce has a little more flair but is still a classic style you won’t need to replace when trends change. We also giving this porch bonus points for the fan above the rocking chairs! There’s nothing better – or more refreshing – than a cool breeze in the summertime.

This porch’s clean lines flawlessly match the sconces, giving the whole look a modern edge we love!

Pendants

A pendant is a light fixture with a cord or chain and usually just one light attached. They’re commonly used above a door in an entryway with a higher ceiling. Pendants are practical, but they also make a gorgeous focal point. Here are a few to inspire your next porch project!

The warm stone flooring on this porch needs some contrast to make it feel up to date. The black-finished pendant combined with the matching black door complete the whole ensemble.

This porch is timeless. A warm door combined with a simple, but elegant pendant is a classic combination to make any house feel inviting.

Pendants are incredibly versatile and work well in a number of locations – not just above the doorway. They’re also a great choice above porch furniture to create a comfy space for a leisurely chat with a friend.

4. Less is More!

Redoing your front porch can feel overwhelming, but it doesn’t have to be. These simple porches prove that less really can be more with some expert advice!

There’s nothing prettier than a warm wood door and black shutters, especially on clean white siding. This porch has. it. all. Symmetrical greenery, gorgeous sconces, some simple furniture, and a fan are truly all you need to have a beautiful and functional porch.

If you have a small porch, using some hanging elements (pendants, flowers, etc.) will add dimension and will give you space for some furniture without sacrificing a beautiful result.

We love the creativity of this small porch! Since there’s no room for plants next to the door, this homeowner added greenery on the sconces. The arched window above the door is the prettiest focal point to bring together an elegant, but minimal look.

This porch looks bigger because of the reflection of the windows on the door. The rest of the space is also well-used. From the small plants placed on stands to make them look taller to the hanging pendant, every inch is accounted for!

5. Pick Comfortable Seating

There’s something nostalgic about sitting on the porch on a summer night – like an ode to the simpler times of days gone by. Picking comfortable seating will make you want to sit on your porch, reflecting and enjoying the simplicity of the moment.

Porch Swings

There’s nothing more soothing than the back-and-forth motion of a porch swing!

The cozy cushions and pillows on this swing make it the ideal spot to snuggle up with a blanket for an autumn nap or to curl up with a book.

This swing lends itself perfectly to a conversation with a friendly neighbor, family member, or friend.

Rocking Chairs

Make the most of warm spring and summer days by relaxing on a rocking chairs with an ice cold lemonade sitting on a table beside you!

Rocking chairs are a comfortable seating option, but they take up less space and aren’t quite as permanent as a swing. The pillows on these pretty white rockers tie in the shutters on the house and are the perfect spot to enjoy a bit of nature.

Rocking chairs are simple and inviting whether they’re styled or not. We love the idea of watching the neighborhood kids ride their bikes, watching the dogs be walked, and seeing the world slow around you as the sun sets from the comfort of your rocking chair.


Don’t let your front porch fall by the wayside any longer! When you’re ready to get to work creating the porch of your dreams, give One Stop Lighting a call. We’ll give you all the tips you need to make your dreams a reality.

Upgrading Your Lighting on a Budget

All the Tips, Tricks, and Secrets You Need to Make Your House Shine on a Dime

If it’s been a while since you redecorated, your current home decor probably isn’t speaking to you anymore. When you’re short on time, updating the lighting is one of the fastest ways to make your home look, well, brighter. But, when you’re on a budget, replacing everything in the house just isn’t the right call. The good news is – you don’t have to! Here’s a few easy, creative, and budget-friendly ways to make your home feel bigger and brighter… without breaking the bank.

1. Swap Your Light Bulbs

Many people blame an old fixture for their lighting woes, when really it’s the bulbs to blame. Try swapping out your old bulbs with a fresh set of brighter LED bulbs!

While LED lights may cost more upfront, they use at least 75% less energy – which means they can give off more light and use less power. They also last up to 25 times longer than traditional light bulbs, so they’ll last for years before they need to be replaced. 

2. Do it Yourself

The cost of lighting installation can eat away at your budget quickly, but it can reduced if you’re willing to do a little research and put in some work. Installing lighting yourself can give you some extra cash to get lights you love.

Before tearing out any fixtures, educate yourself on the proper safety precautions! If you’re unsure about doing it yourself, don’t forget to budget for the professional help you’ll want!

3. New Shades, New Me

If your light fixture comes with shades – whether they’re glass, fabric, or metal – you might be in luck! Did you know you can replace the shades or globes on most fixtures that have them? A new set of shades is WAY cheaper than buying an entirely new light fixture, and it will make just about any fixture feel brand new again! With a like-new fixture, your space will match your style, leaving you (and your wallet) feeling happier.

4. Refinish Your Fixture

Another alternative solution to buying a new light is changing the finish of your existing fixture. With a little rub n’ buff and a handy youtube tutorial, your light will look totally different! This may need some touching up down the road, but when you need a quick fix to get you by until you can invest in a higher-quality fixture, a little DIY magic can help stretch your money. A little finish can take your fixture from outdated to updated while keeping your budget happy. 

5. Mirror, Mirror

In our opinion, quality lighting makes the biggest difference in a home, but adding mirrors can also increase light–if they’re well-placed. Hanging a mirror near a light or window can help reflect light, making the space look brighter and bigger. That reflected light can go a long way in lighting up a dim room!

6. Focal Point Focus

Another way to make your space look upscale is picking a more expensive light to be a focal point, while adding other less spendy lights to light up the room. The eye will be drawn to the focal point and won’t notice anything else! To start, install a chandelier to draw attention away from any existing recessed lights. Throw in a floor lamp where you need some extra lighting and–voilà! Your eye will be drawn to the chandelier, but the room will still be beautifully lit.

7. Add Lamps, Lamps, and more Lamps!

When in doubt, add a lamp! They’re cheaper, require little to no installation, and are a great design piece. Tabletop lamps make great decor for your tablescape and can light up a workspace. Floor lamps create a homey conversation area in a living room. Lamps are a super versatile, budget-friendly option to give just the touch of light you need.

—

We know that when you’re on a budget, every penny you spend matters! To be sure you’re spending all of them wisely, give us a call! We’ll match you with the best lighting solution for your budget and save you money so that you can get lights you love.

Step-by-Step Guide to Home Lighting Renovation

How to Plan, Prioritize, Budget, and Make it Happen

Updating the lighting in your home is one of the quickest ways to give your house a facelift. It’s easy to accidentally overspend on your house’s lighting if you don’t have the right information, but not to worry! With a few pro tips and some help from One Stop Lighting, your home will feel brighter and look better – without breaking the bank.

1. Make a Plan

Before you start tearing lights out, pull up a chair and make a solid plan. When you’re on a budget, prioritizing which spaces need the most love is key. Look in each room and make sure all your spaces have multiple lighting sources to eliminate shadows and illuminate workspaces. 

Once you’ve done that, think about lighting focal points. Where do you want your lights to make the biggest impact? A few places to consider starting are: above the dining room table, in the living room, and in the bedrooms.

Pro tip: Make a list of all the fixtures you want in order of importance–it will come in handy later!

2. Evaluate Your Budget

Do your research and be realistic about your needs and wants. Knowing how much you can spend and being an informed buyer will help you make the most of your money and avoid overspending. 

Take a look at your budget and decide on two numbers – the amount you’d like to spend, and the highest amount you’re willing to spend. Then, put together some ballpark estimates for the fixtures you want. 

When you walk into the showroom prepared, you can put your money where it matters most!  It’ll also help us to know what price range you’re looking at to match you with the perfect fixture!

Pro tip: Don’t forget to include the costs of professional installation and light bulbs in your estimate! 

3. Prioritize Your Needs

If you’re renovating on a budget, ask yourself: Which light fixtures will make the biggest difference in my house? Remember that list of fixtures you made earlier? Pull it out and prepare to rearrange it. 

Prioritize fixtures that give off ambient, or full-room, light. Once you have those at the top of the list, move on to task lighting. Any workspaces will need additional lighting above them (kitchen counters, bathroom vanities, desks, etc.).

If you still have room in your budget, consider adding accent lighting to features in your home you want to highlight. Moving from general to specific will help you narrow your focus to what really matters, and light your house without running low on change.

4. Pick Your Fixtures

It’s easy to get sticker shock when you start looking at light fixtures. When you’re choosing lights for your renovation, you have two options: you can get a cheap fixture that will work for now, or you can get a quality fixture that will work for years. 

While there is a time and a place for inexpensive fixtures, just remember that buying lights that will stand the test of time will actually save you money in the long run. 

You also need to keep in mind how often you want to redecorate. Trendy fixtures will look outdated much faster than classic styles. If you don’t want to be repeating this process again in 5 years, get a classic, quality fixture that won’t need to be replaced when the fads change.

Pro Tip: Selling your old fixtures online can give you a little extra to put towards your next lighting purchase.

5. Remember the Bulbs

While LED lights cost a little more up front, they use at least 75% less energy, and they last up to 25 times longer than traditional light bulbs. To be sure you’ll see savings on your electrical bill, look for bulbs with the Energy Star rating logo on the packaging. 

Don’t make the mistake of buying bulbs that you’ll just have to replace in a few months! Be sure to work LED bulbs into your budget–we promise it’ll pay off!

6. Do It Yourself

One major cost of updating lighting is installation. In many cases, a handy homeowner with the help of a few Youtube tutorials can save money by doing it themselves. You may also consider installing some lights yourself and having others professionally installed–dropping a heavy chandelier would put a dent in your budget (and your floor)!

However, if you’re going to go this route, researching and implementing all the safety precautions is non-negotiable. Being well-educated can save you from causing a fire, burns, or other safety hazards.

If you’re unsure about doing it yourself, no worries. Just make sure to factor the professional help you need into your overall budget!

—

Updating and replacing lighting on a budget can feel like a daunting task, but with these tips and our expertise, you can’t go wrong! The step-by-step guide we made will help you have amazing lighting without feeling financially strapped.

If you get stuck on any of these steps, give us a call and we’d love to chat about solutions.

3 Ways to Layer Light and Level Up Your Interior Design

Have you ever been to a friend’s house whose home has that X factor? Something that made it seem really inviting even if their decor wasn’t notably upscale? That friend probably had great lighting.

Color, shape, and texture are the building blocks of interior design–but lighting dictates how everything comes together. So, what goes into a well-lit room? Design experts recommend having 5-7 different light sources in any space. These “layers” of light make it so that you can customize the mood, function, and comfort level of a room depending on how you’re using it.

There are three basic layers of lighting to consider: ambient, accent, and task lighting.

Read on to see how these layers of light work– we’ll show you exactly how things like location, bulb choice, and design combine to give you the perfect lightscape. Then the ball’s in your court! Working layer by layer, and with just a little bit of insider lighting know-how, it’s easy to give your home that X factor too– without having to replace a single decorative pillow.

Layer One: Ambient Lighting

The most basic level of lighting for any room is ambient lighting. Ambient lighting is the light that fills the room, casting an even glow from overhead. In most homes, this will come from a central flush mount (often the dreaded “boob” light), a ceiling fan and light combo, or can recessed lights.

Let’s dive into top considerations to creating great ambient lighting.

Location

If you are using one large light as your ambient light source, keep it central with maximum light flow. It’s usually a good idea to use a glass covering instead of metal or wicker shades to avoid creating shadows.

If you want to create ambient light with a grid of recessed lights instead, spacing is critical. An easy trick to determine how far apart your recessed lights should be is to divide the height of the ceiling by 2. For example: For 8-foot ceilings, divide 8 by 2 (8÷2=4) – consider staggering your can lights about 4 feet apart for optimal lighting.

Pro Tip: This formula will get you started, but there’s a lot to consider if you’re installing a new grid of recessed lights in your home. The size and trim can vary greatly, which will have a big impact on light coverage– and you need to take the shape and layout of your room into account. If you want help getting your recessed lights spaced correctly, stop by our showroom and check in with one of our lighting specialists!

Bulb Choice

Each room of your home will have different bulb requirements. For your kitchen, bathroom, and office, lean into brighter, cool light. These bulbs will activate your brain for better concentration and focus. Look for bulbs that say “bright white” or “daylight” on the packaging.


On the other hand, bedrooms and living rooms are usually dimmer and warmer to encourage relaxation. These bulbs will say things like “soft white” or “warm white” on their box.

Design Tips

While there’s not necessarily a one-size-fits-all solution, great ambient lighting will completely transform the way your room feels. Here are a few tips that will translate across most rooms and decor styles:

  1. Consider replacing the standard “boob” lights. While they’re great at lighting a space, the shape of these lights can sometimes feel boring or dated. Don’t be afraid to get creative– there are so many other options available!
  2. Play with paint colors: the color and tone of your walls have a big impact on how the ambient light reflects. Check your paint samples at different times of the day to see how they look with both daylight and your light fixtures. 
  3. Think about going bigger! If a flush-mount fixture feels underwhelming, take a look at other options like ceiling fans or pendant lights. Chandeliers are also making a comeback– they’re not just for vintage vibes! You can play up crystal delicacy for a soft touch in a modern room or branch out with wood beads or other designs.

Pro tip: If you’re planning on replacing your ceiling fixture yourself, make sure your new light is properly supported. You might need to install a sturdier electrical box to support the extra weight of a larger fixture– just check the installation guide before you get started!

Layer Two: Task Lighting

The next layer of your lightscape is task lighting. Task lighting shines extra light on a space to make doing a specific task easier and/or safer. It’s especially helpful for tasks that involve working with small objects, like sewing, or that require concentration, like reading.

Location

You need task lighting anywhere you are performing detailed work. Your home likely already has some task lights installed in common places, such as a bright wall sconce over the bathroom mirror where you get ready, and pendants or recessed lights above a kitchen counter. 

Lamps are the real MVP of task lighting, because they can go anywhere you can run a cord. You’ll find them sitting on a desk, in the garage over a workbench, illuminating the music on a piano, next to a cozy reading nook, on the bedside table, and more. 

Bulb Choice

Task lighting usually uses bright white light to get the best view and activate the attention centers of your brain. There are a few exceptions, however. If you’re lighting a reading nook or a bedroom you’ll want softer and/or warmer light to get that cozy comfort.

Design Tips

Even though task lighting is “task-oriented,” it doesn’t need to be 100% utilitarian. Here are a few ways to think about making your task lighting both beautiful and functional:

  1. When possible, work with odd numbers of light– it will feel more organic. For example, 3 or 5 pendant lights will look usually better over a kitchen counter than 4. 
  2. Experiment with different materials for lampshades. A glass shade will maximize the glow, woven shades will give a light filtering effect that softens the light, and opaque shades will concentrate the light. You can completely transform the way a lamp or pendant lights your space with a simple shade swap! 
  3. Don’t forget your bathroom vanity! Most vanities have a light above the mirror– but that’s not necessarily the best placement for getting ready. Face-level light on either side of your mirror is best for doing things like applying makeup.

Pro tip: Did you know that LED light is widely considered the best lighting for applying makeup? It’s the closest to natural daylight! Try a backlit mirror or LED strips at facelevel to see your makeup’s true colors.

Layer Three: Accent Lighting

Accent lighting is the fun layer– it leans much more into design than function. The purpose of accent lighting is to create a mood, or to highlight a specific feature in a room like an architectural detail or a piece of art. 

Location

Unlike ambient or task lighting, accent lighting doesn’t have a simple rule for best placement. Whether it’s hanging from the ceiling, sitting on a shelf, or standing on the floor, accent lighting can come from anywhere and shine on anything. 

One way to determine where you need accent lighting is by thinking about your favorite evening activities. For example, where do you and your family cuddle for movie night or bedtime stories? Turn off your ambient lighting and see where you need a lamp, some sconces, or LED strips.

Pro tip: Plan on having 2-3 sources of accent light per room.

Bulb Choice

Accent lighting that’s highlighting a feature is typically small and bright. For accent lighting that’s creating a mood, look for dimmable options. Either way, you’ll need warm bulbs to achieve a cozy glow! Look for bulbs that say “soft white” for the gentlest light, with “warm white” as a close second. 

Accent lighting opens the door for you to get creative! Check out some color-changing smart bulbs or LED strips that can really change the way your room feels with just the touch of a button!

Design Tips

Accent lighting is very specific to a person and their space, so there aren’t any hard-and-fast rules. Here are a few ideas to get your imagination flowing:

  1. Fill in the blank: if you’re missing a color or texture in your room, try bringing it in with an accent lamp. Warm up a modern space with a wooden or stone lamp, or balance your color palette with a new lampshade. 
  2. Choose the unexpected: use sconces and pendants where you’d normally place a lamp. For example, if you have a couch tucked into a corner that could use more light, save floor space by hanging a pendant above the seat.
  3. Track lighting isn’t just about the lights– it can elevate your room by highlighting other decor and collections! Try placing them above your gallery wall to elevate your wall to an art museum experience. 

Pro tip: Renting or want to avoid hiring an electrician? You can still use pendants and sconces! There are special varieties that use a plug– no hardwiring required. 

Ready to Customize Your Lightscape?

Now that you have the guiding principles ready, the possibilities are endless! If you’re ready to get serious about your home’s lighting and design, the experts at One Stop Lighting can help you connect to a showroom near you. Contact us today!

9 Surprising Ways to Glow Up Your Home Exterior (Literally)

Most neighborhoods look the same when you drive at night. Because no matter what makes homes unique during the day, they almost all only use a porch light or two at night. But your home doesn’t have to lose its character and statement features just because the sun went down!

You may be surprised that there are at least nine ways to light your home’s exterior. We’ll dive into expert tips to unlock the unexpected for your evening curb appeal and outdoor activities. From increasing safety to creating drama to inspiring luxury, mix and match these lighting methods to customize an unforgettable “evening look.”

1. Accent Lighting

Accent lighting uses light to draw attention to a feature of your home or garden. In fact, any of the following eight lighting techniques can be used as accent lighting! For example, try using a spotlight to show off a flagpole, up-lighting on a few trees to increase their impact, or silhouette shrubbery for subtle mystery.

A tip from the experts: Trying to figure out what to accent on your home exterior? Make a list of your favorite things about your front yard (or what you’d like to add to your yard).

2. Down-lighting

Want to increase visibility for outdoor activities? Try down-lighting! This lighting technique positions the light source up high with a shade that concentrates the light towards the ground. The bright light makes evening play safer and keeps the party going after sundown.

A tip from the experts: Trees are a great place to nestle down-lighting sources with finesse.

3. Highlighting

You’ve likely seen yards in a fancy neighborhood that look like their trees are glowing somehow. They’re probably being highlighted! By shining a spotlight or two from the base of a tree or other feature, the light will reflect only off the object. This concentrated glow makes the object look like it is lit from the inside!

A tip from the experts: Highlight is a simple way to immediately make your home look upscale and luxurious.

4. Moonlighting

Are you looking for more magic and romance in your outdoor space? Then try out moonlighting! Like down-lighting, moonlighting uses a high-up light source to concentrate light downwards. However, this method uses more subtle sources and dimmer light– mimicking the softness and mystery of a full moon!

A tip from the experts: Moonlighting is most effective in backyards and wooded areas, where the soft light can trickle down through the leaves.

5. Silhouetting

Silhouetting is the opposite of highlighting, but its effect is equally dramatic. Instead of lighting the feature itself, you can use the light source behind a tree and the wall. This will shine the light on the wall and cast the tree or other features into shadow. So you’ll get the soft shape of your feature, giving impact in a subtle way.

A tip from the experts: Make sure to angle the light towards the wall to create the greatest effect!

6. Shadowing

Want to spread the beautiful pattern of your tree leaves against your home? Then shadowing is the perfect technique for you! Shadowing combines highlighting with silhouetting for a completely new effect.

Like silhouetting, you’ll position your light source towards a wall behind the tree. But, like highlighting, you’ll put the light in front of your tree. As a result, you’ll cast a dramatic shadow of your tree against your home while clearly illuminating the trunk.

A tip from the experts: This works best with tall, leafy trees for an enchanting summer evening. The bare branches will look stunning in the winter too!

7. Path-lighting

Upgrade the magic and safety of your front walk or garden path with path-lighting! Solar lights are easy to install and come in endless designs and colors. Not only will path lights make your home safer, but you’ll get to enjoy your plants and landscaping around the clock.

A tip from the experts: Space your path lights 5 to 10 feet apart, depending on the lamp’s brightness.

8. Up-lighting

Want to add drama with a contoured view of your home? Up-lighting uses spotlights to throw light upwards on your home exterior. You’ll work with the natural layers of your home to create interest and luxury. Even in a cookie-cutter development neighborhood, your home will stand apart!

A tip from the experts:  Try staggering these lights along the ground level and roofline to maximize the impact of your home’s features.

9. Wall-washing

Our final lighting tip brings us to wall-washing. This method uses focused ambient lighting to cast even light across an entire wall. Instead of the dramatic shadowing created by up-lighting, you’ll get a clear picture of the garden or home wall without harsh light.

A tip from the experts: The key to great wall-washing is placing the light source at a wide enough angle. Hide the source in low foliage for added mystery.

Need Help?

Proper lighting is essential to a fully functioning home– but it can be challenging to nail balanced brightness, great fixtures, and a budget! Contact the experts at One Stop Lighting for advice on your project!

2023 Interior Design Trend: Creating a Cozy House that Feels Like Home

It’s 2023 and this is your wake-up call! Your home needs you – it’s ready for a refresh! This year, we’re all looking for a respite from the stress that always seems to work its way in. Designing a comfortable home will make you feel the extra happiness and productivity you’ve been in desperate need of. These 3 expert tips will make your home a haven you’ll be itching to get back to at the end of the day!

1. Choose a Soft Color Palette

It’s no secret that colors have a huge effect on your mood and the feel of a room. These rooms knock the color palette out of the park without sacrificing personal style or comfort. Achieving a soft color palette doesn’t have to be difficult – go with neutrals, a pop of color, or choose a monochromatic color scheme and you’re set!

Neutrals

A neutral color palette seems like an obvious choice when you’re going for comfort, but it can be tough to pull off – without color, other elements like texture or shapes will have to do the heavy lifting.

The heavyweight champions here are definitely the plants! Adding some green to an otherwise neutral-heavy space brings some life and vibrance without destroying the tranquility you desperately need. Finishing this look with a variety of textures and shapes from the hard wood edges to the pair of round tables to the woven area rug makes this space feel comfortable, creative, and cozy.

This neutral bedroom incorporates beige and white with black accents to ground the space. The night stands with pendants hanging above elevate the space, giving you lighting and a gorgeous focal point! We love how this space feels lived-in without looking cluttery. With neutral tones, the soft textures of the rug and blankets are what make this room feel comfortable and cozy.

Picking a neutral color palette for this sitting area really make the shapes shine. We love how arches are carried throughout the design from the furniture to the architecture. This chair looks like a cloud and with the gorgeous light above it, anyone sitting here would feel like they’re in the heavens!

Pop of Color

A cozy home doesn’t have to be colorless! If neutrals don’t speak to you, try mixing them with a pop of color. It’ll give your room some excitement, but not so much that it’ll feel busy or chaotic.

This living room took a bold color and ran with it. The navy blue is a stunning contrast to this cozy tan leather couch. If we could copy and paste this look into our homes, we would! The neutrals pop against the accent wall and we couldn’t be more obsessed.

These red velvet pillows and drapes contrast with the neutral room and bring in some cozy texture. The bright colors spice up what might otherwise feel like a bland living room.

Monochromatic 

Choosing a monochromatic color scheme is a 2023 trend we love. It’s bold, but still soft. In a true monochromatic space, there isn’t extra visual stimuli for your brain to process. This gives your brain a sense of peace and calm you may not feel in a room with more going on in terms of color. These rooms use a simple color palette and the effect is cozy with a touch of elegance. 

Green is one of the most soothing colors. It can bring a sense of peace and harmony to your home. This couch and wall combo is no exception! Choosing to pair them with beautiful browns makes this sitting room look like it was plucked straight from nature, then given a facelift.

This kitchen uses the monochromatic color scheme to make it look bigger than it is. We especially love that extra wood cabinet with accent lighting both for functionality to store more and for decorative purposes. The calming blues make this a space you’d want to do some stress-baking in!

2. Add Soft Textures

Texture is a vital tool in an expert’s tool belt, especially when comfort is your end-goal. A space can be gorgeous, but if it feels like a place your grandma will yell at you for touching anything in, it won’t really feel comfortable. Texture is what takes a space from formal and austere to a beautiful, cozy space you can actually live in.

There’s no question this bedroom is gorgeous, but it also feels like a space you could spend time in without completely messing it up. The intentionally unkempt linens on this corner of the bed add simulated texture that makes it feel like home. We also love the green velvet accent pillow and floor pillows for an extra cozy touch! A lamp and pendant allows you to have dimmer or brighter lighting to accommodate your changing needs.

There is no world where a chunky-knit blanket and lots of pillows won’t scream comfort. The touches of fur on the rug and the side bench give it an extra dose of coziness. Anyone would love to curl up and hibernate here all winter! Light a few candles in the lanterns and switch on the pendant for the perfect reading spot at night.

This feminine bedroom is a corner of paradise! The colors are soft and gorgeous, but the textures are what really make this space magical. The velvet headboard brings delicate softness to the space. The textured pouf and cane-detailed night stand here are working overtime – and they should get paid for it! They bring elements of texture and give some seating and storage space. The blanket and soft rug are the finishing touches that would have anyone making excuses to retreat here for peace and quiet.

3. Soften Your Lighting

Harsh lighting is the opposite of comfortable! It’ll leave you with a headache and can actually make it harder for you to sleep at night. To bring in some much-needed comfort, you’ll need to soften up your lighting. In a room with soft lighting, the transition from light to dark is gradual and easy on the eyes. Avoid harsh shadows and balance your lights out using these three tips and your eyes and mood will thank you!

Dimmable Lighting

Switching to dimmable lights is a relatively simple way to soften your lights and make your lighting customizable. This cozy room is the perfect place to recharge your batteries. Dim the lights 2 hours before bed to help yourself sleep better, then brighten them in the morning to jump start your mood and your day!

Layer Your Lights

Layering your lighting is a fool-proof way to give you adjustable light. Every room in your house should have at least a few light sources to make it feel more comfortable and eliminate any dark corners. Adding a few lamps across a room and some pendants will give you flexibility to have more or less light depending on your need and mood.

Accent Lighting

Accent lights are the finishing touches that make a room feel complete. They’re the piping on top of the icing on the cake! Adding them makes a room instantly feel warmer and more comfortable. Plus, they soften up your lighting by eliminating harsh shadows in areas that might otherwise go overlooked. Put sconces on an empty wall, strip lighting under cabinets like in this kitchen, or pendants above conversation areas. A room with warm, balanced lighting is a guaranteed ticket to having the relaxing ambiance you need for comfort.

—

Listen, it’s 2023 and it’s time you started living your life in comfort! Choosing to design a cozy home is about more than just aesthetics. It’s about overall wellness! You deserve to live in a home you love, so it’s time to get started. With a little inspiration, the expert tips above, and help from One Stop Lighting you’ll be set! Give us a call and we’ll help you soften your lighting and give your home the extra relaxing boost it needs.

Does Your Rental Have Bad Lighting? – 5 Top Lighting Complaints (and Solutions) for Renters

Renting an apartment or house is a great way to maintain flexibility and save up for future investments. But making the space your own can be challenging– especially if it’s a long-term rental. Many renters don’t feel that changing up their rental lighting is an option for them – but taking control of your lighting (in a renter-friendly way) is actually one of the best ways to make your rental feel like home.

The basic lighting in rentals isn’t always ideal, and bad lighting can really make your home feel… off. So we’ve come up with five of the top complaints from renters that we hear all the time – and we’ll follow them all up with renter-friendly solutions to make your space a cozy, personalized home for as long as you live there.


“My rental feels cold and sterile.”

Lighting has a massive impact on the way our room feels, and on how we feel when we’re in it. Aside from throwing out a rug and hanging some art, tweaking the lighting can also make a room feel more warm and less sterile.

What to try:

  • Use textured lamp shades to create depth, color, and coziness.
  • Swap out mismatched and too-bright bulbs for warmer colored bulbs. 
  • Add battery powered string or LED accent lights to light dark corners and to create a softer lighting environment for the evening wind down.


Not sure where to start? Check out your local lighting showroom for expert advice and a wide variety of light fixtures!


“There isn’t enough light in my apartment.”

A lack of adequate lighting can make any space feel tired and dull, and it’s hard to get anything done in the dark. Adding more light sources is a great way to improve the homey feel – plus, it’s really easy!

What to try:

  • Aim for 5-7 light sources per room, including existing lights and windows. Lamps are a renter’s best friend! 
  • Make the most of natural lighting by using sheer privacy curtains, light paint colors, and mirrors.
  • Use the best light bulbs for your needs. LED bulbs can give off a lot more light than traditional bulbs, so they’re a great option for a quick light boost.


Simply having enough light is one of the easiest and most powerful tools to make your space feel like your home.


“My light fixtures are outdated/don’t match my aesthetic.”

It’s pretty common for rentals to have either original (outdated) or builder-grade (basic) light fixtures. Installing new custom lighting isn’t often an option, but it doesn’t hurt to ask! Some landlords will be fine with updating their lighting, especially if you remind them that it will increase their property value.

What to try:

  • Always consult your lease and your landlord before making permanent changes to your rental.
  • Before you start, make sure that your new fixture will work with the existing wiring and switches.
  • Switching a light fixture is a pretty simple DIY in most cases! Check out this Youtube tutorial for a typical DIY ceiling fan replacement.


Investing in a new fixture as a renter is a smart move if you plan to stay long-term. Great lighting completely changes the feel of a room – consider it an investment on your comfort! (Every lease is different – you may even find that you’re fine to replace the light so long as you switch it back upon moving out, so you can take it with your to your next place!)


“I can’t install new wired lighting, so I’m stuck with what came with the rental.”

Many renters feel creatively limited with their lighting options. If your rental had cruddy lighting and you’re not allowed to touch it –  it may feel like you’re stuck. But the good news is – there are a LOT of lighting options available now that don’t require hardwiring anything, and many can be installed without drilling any holes!

What to try:

  • Battery-powered sconces and LED strips add a lot of personality. They often need to be screwed to the wall.
  • Hate changing batteries? These also come in corded varieties, so you can plug-in sconces, lamps, and LED strips anywhere you need.
  • Turn a hardwired fixture you love into a battery-operated one with and LED puck in place of the bulb!


These options can help you elevate your apartment without creating permanent changes – and you’ll get to sell them or take them with you when you go.


“I don’t know what to look for when shopping for a light fixture.”

Light fixtures significantly impact your home, but they’re not something you shop for very often. While an endless number of online options can seem like a good thing, it can often lead to uncertainty. 

How do I know what style to shop for? What does the fixture look like in person? Is it well-made, or will it fall apart in 3 months? Are there hidden costs not shown in the listed price? Can I install it?

What to try:

  • Check out Pinterest, interior design social media accounts, and design magazines to get an idea of what your space needs. Create a mood board from these ideas to narrow down your style!
  • Visit your local lighting showroom with pictures of your space and your inspirational photos to get customized help.

‘

—

If you’re not sure what you want or where to start, it’s easy to get lost in a search filters nightmare. Find inspiration, then skip the hours of hunting and go to a showroom. 

Lighting showrooms specialize in making your home feel its best with great lighting. You’ll get better advice and find what you need faster. Plus, showrooms vet their products – so you won’t end up with a dud that breaks 3 days after the return window. 

It can be challenging to nail balanced brightness, renter restrictions, and a budget! If the lighting in your rental just isn’t cutting it, skip the headache and stop by our showroom. We’ll help you turn up the lights!

How to Safely Replace A Ceiling Light

Ceiling lights are a must-have feature in any room. Whether you don’t like the previous homeowner’s taste or you’re just ready for an update, ceiling lights can revitalize your home space. It may be even easier than you think–just follow these steps to safely switch out those old light fixtures for a new look.

What you’ll need:

  • Screwdriver
  • Step ladder
  • Voltage detector 

You may also need:

  • Wire cutters
  • Wire strippers
  • Pliers
  • Painter’s tape
  • An extra set of hands 

Part 1: Remove Old Fixture

Step 1: Turn off power

Shutting off the electricity is important to your safety. Locate the switchboard for the room you are working in and flip the switch. If you’re not sure where the switchboard is, check the basement or garage. It might also be in the front of the house or near the entrance.

Once you’ve flipped the switch for the room with the ceiling light, go back into the room and flip the switch a few times to make sure the power is off. Then, leave the light switch in the off position. Make sure you lock the circuit box or leave a note indicating that you are working. 

Step 2: Remove cover and bulbs

Use a stable step ladder to reach your ceiling light. Hold the cover, or the visible, outside piece of the light fixture, in place with one hand. Loosen the screws with a screwdriver in the other. (For heavy or large fixtures, it’s best to have someone else hold on while you work on the screws.

Once the cover is removed, unscrew the light bulbs and set them aside.

Step 3: Lower the fixture base

With the cover removed, you will be able to see the base–the part of the light fixture that attaches directly to the ceiling. Typically, the base will have tabs or nuts and screws securing it. Loosen the nuts or screws, then lower the base to access the wiring (In the rare case you’re unable to find the screws, search for the installation manual online. You can also take a picture of your base and bring it into our showroom – we’ll take a look and help you figure it out!)

Until you have disconnected the wiring, you will want to lower the base but not remove it completely—an easy way to do this is by securing it with painter’s tape or having someone else hold it in place.

Step 4: Disconnect the wires

Once you have uncovered the space behind the old light fixture, there should be a junction box where wires are connected and stored. Start by removing the caps or tape covering the wire connections. The caps will come off when twisted counterclockwise.

 Pro Tip: Take a picture beforehand so you can remember exactly how everything was put together. 

Part 2: Connect the Wiring

Step 1: Test voltage

Test each exposed wire by touching it with the tip of your voltage detector. 

If the voltage detector lights up, there is a current running through, and the wire is unsafe to touch. Double-check your circuit box and ensure the switch is still flipped. 

Once you’re sure there is no electrical current, you are safe to continue working with the wires.

Untangle the wires and detach the fixture from the ceiling completely. Either hand off to someone below or carefully carry it down the ladder.

Step 2: Check wires

Frayed wires can be hazardous -if there is any fraying on the end of the wires, trim them down with wire cutters. Then, strip off any insulation on the outside with wire strippers. You only need to strip about ½ inch of insulation for the wire connection.

Pro Tip: Check your new fixture’s installation recommendations carefully. If you’re installing a heavy fixture such as a ceiling fan or chandelier, you may also need to install an additional support in the ceiling. 

Step 3: Match and Attach

Electrical wires are color-coded. Black or red are hot wires, white is neutral, and green or bare copper are ground wires. A grounding wire sometimes connects to a grounding screw instead of another wire. Look for a matching wire in your ceiling for each wire in your fixture.

Twist together each matching wire. Either by hand or with pliers, hold the exposed ends side by side with one hand and twist with the other. (This is where your picture of the original fixture’s wiring comes in handy.)

Now that the wires are connected, it’s important to cover the exposed ends again. Screw the wire caps on by twisting clockwise over the connected ends until they hold the wires tightly in place. If your original fixture didn’t have wire caps, you can use electrical tape as well.

Make sure to check the owner’s manual for specific instructions—for example, you might have an extra red wire that connects to a black wire. If you don’t have any instructions, generally you will be fine with just matching the correct wire colors.

Part 3: Install New Fixture

Step 1: Replace junction box

With all your wiring safe and sound, the junction box is ready to be put back into place. Tighten the screws securely against the bracket until  Fold the wires up into the box so they will be hidden behind the ceiling light.

Step 2: Attach new fixture

There are several different ways your new light fixture base could attach to the ceiling—these are the most common ways. As always, check the owner’s manual for anything specific or unique about your light.

Securely attach the light base by positioning it over the mounting screws. Place a metal nut on each screw and twist by hand until they are tightly holding the base in place.

If the fixture has a mounting bracket, connect the mounting bracket to the junction box first, then hang the base over the screws.

If it’s a keyhole shape, adjust the base so the screws slide into the smaller grooves and then tighten the screws with a screwdriver until they are holding the base securely.

Step 3: Install light bulbs

Now that your base is set, it’s time to add the light bulbs. Make sure you have the correct wattage—the fixture typically indicates its maximum wattage on the package or owner’s manual. 

When choosing which bulbs to use, the lower the wattage the safer. Most light fixtures are safe with up to 60 watt incandescent bulbs. You may also want to consider more eco-friendly choices, such as CFL or LED bulbs. These options have lower wattage but produce the same amount of lighting, saving you money on electricity in the long run.  

Test the bulbs by turning the electricity back on—flip the switch on the circuit breaker then turn on the room light switch. If it is flickering, dim, or not turning on at all, turn the electricity off again and check everything—look for loose connections or mismatched wires. If your lights are bright and solid, you are ready for the final step.

Step 5: Attach cover

Flip the light switch and circuit breaker back off before installing anything else. Take your light fixture’s shade, cover, or top and climb back up the ladder. Attach it to the base by twisting screws or attaching pieces until everything is tight and secure. If it’s a hanging light, make sure it’s at the proper height before finishing your work. Every light has different connecting components, so check your owner’s manual and just make sure it’s snug.

And there you have it, your guide for installing a new, updated ceiling light. Now that you know how to install it, make sure to visit our showroom to choose the perfect fixture for your ceiling!

  • 1
  • 2
  • 3
  • Next Page »

Recent Posts

  • How the Benefits of Light Can Decrease Depression
  • 4 Ways to Avoid Headaches in Your Home
  • 5 Tips to Improve Your Relationship With Light
  • 5 Lighting Design Rules: Keepin’ it Lit!
  • Lighting as Medicine: Research Suggests It’s a Thing

Categories

  • 2020
  • 2023
  • Accent Lighting
  • Bathroom Lights
  • Bedroom Lighting
  • Bulbs
  • Buying Guides
  • Ceiling Fans
  • Ceiling Fans
  • Ceiling Lights
  • Ceilings Lights
  • Chandeliers
  • Decor & Home Accents
  • Dining Room
  • General Lighting Tips
  • Healthy Lighting
  • Holiday
  • How to
  • Informational
  • Kitchen Lighting
  • Lamps
  • LED
  • LED Lights
  • Life & Style
  • Light Bulbs
  • Lighting Types
  • Mirrors
  • Outdoor
  • Outdoor Lights
  • Recessed Lighting
  • Safety
  • Sleep
  • Smart Lights
  • Styles & Trends
  • Styles and Trends
  • Wall Lights
  • Wellness & Safety

One Stop Lighting

Copyright © 2025 One Stop Lighting