One Stop Lighting
MENU
  • Buying Guides
  • Styles & Trends
    • Bathroom Lights
    • Ceiling Fans
    • Ceiling Lights
    • Lamps
    • LED Lights
    • Outdoor Lights
    • Smart Lights
    • Wall Lights
  • Wellness & Safety
  • Shop Products

7 Ways to Glow Up Your Pool: Lighting Tips from Lighting Experts

Having a pool in your backyard is an incredible luxury. But what takes a nice pool to a jaw-dropping show-stopper is excellent light scaping. So if you’re prepping for a high-impact pool renovation, your lighting is sure to give you the luxury factor you’re looking for!

Great lighting highlights your pool features and turns them into a breath-taking statement even when you’re inside. And it extends your pool party to after-dark!

But great pool lighting can be very different from landscape or interior lighting. That’s because pool lighting requires a lot of finesse, keeping glare to a minimum. So we’ve compiled seven tips to help you keep your pool area bright, luxurious, and inviting.

Let’s dive in!

Moonlighting– General Lighting Without Glare

There’s not much that’s better than a swim in the moonlight. Unfortunately, you can’t always count on a full moon and a cloudless sky, so a lighting technique called moonlighting is the next best thing. 

Moonlighting uses an elevated light source that softly concentrates light downwards– basically, it mimics the moon! It creates soft, ambient lighting without a harsh glare on your eyes or reflecting too much light off the water. And there’s no denying that moonlighting will bring your pool from basic to luxury!

Expert Tips:

  • When you can, tuck moonlighting fixtures away in trees or your roof to make it feel more like natural moonlight.
  • Use warmer, more yellow light to keep the pool area a relaxing space. Bright white lights are more likely to create a harsh glare.
  • The size of your pool deck will determine how many lights you’ll need to get the glow just right. If you’re unsure how many you need, it’s better not to guess. Too many, or too few, won’t create the illusion. Before you buy, contact a local lighting showroom to get expert advice on your yard’s unique dimensions and needs. 

Light the Water

Another great way to gently increase visibility is to light up the water in your pool. A bright pool makes it easy to swim or chat on the deck without disrupting the mood. So put lighting the water on the top of your pool upgrade list!

Expert Tips:

  • Always use underwater-grade lighting. Electrical safety is critical when you’re around water, so make sure you get the right bulbs.
  • Proper placement matters. Keep the lights relatively close to the water’s surface, spaced at least 3-4 feet apart. It’s easy to overdo it with underwatering lighting, so remember – the fewer bulbs, the better.
  • Lighting an existing pool? Unfortunately, installing underwater lights in an existing pool is pretty difficult. Your best bet is to contact a pool installation expert to see what it will take to get your pool equipped with underwater lighting.

Keep Stairs and Walkways Safe

Your pool renovation has to keep the surrounding area in mind. Whether entertaining or playing with your family, safety is always a top concern. So always keep walkways, steps, and pool borders clearly defined and visible. The good news is, you don’t have to sacrifice style to be safe! 

Expert Tips:

  • Tuck lights under the stairs to hide the light source and reduce glare. You can also light your stairs from the side with stylish fixtures that create visual interest while lighting the way.
  • Use reflective materials around the sides of your pool to highlight the edges so they’ll catch the light without having to shine light upwards.
  • Solar lamps are an excellent option for lighting walkways. They’re very low-maintenance and come in an almost endless variety of styles.

Highlight Water Features

A waterfall or fountain brings a home pool from a fun time to a luxurious experience. But the magic shouldn’t stop after sundown! Lighting your water feature will upgrade it to an around-the-clock art experience.

Expert Tips:

  • Color-changing LEDs help to match the mood and keep your water feature flexible. Check the packaging to ensure they’re safe for outdoor use and have color-changing capabilities.
  • Tuck light sources behind or underneath the stream to light the way. You’ll need water-grade lighting for a safe light show.
  • Highlight the fountain or waterfall architecture to complete the experience. While these lights may not be underwater, you’ll still want to make sure they can handle the strain of the elements in your climate.

Make Landscaping Pop

Your home landscaping plays a vital role in every swim, day or night! So play up your trees, shrubs, and flowers in your pool renovation with a few of these lighting tips.

Expert Tips:

  • Silhouetting uses a ground light source behind a row of shrubbery to create a shadowy effect on a wall behind them.
  • Highlighting also uses a ground light source but shines in front of trees or other plants to make them look like they’re glowing.
  • Hang fairy or string lights around or between trees for a soft, enchanting touch. Plus, these are easy to hang yourself and take down for the off-season.

Bring in Island Vibes

Want to bring a piece of island living to your backyard? A few careful lighting tricks can land your home beach bash in a true paradise. And it may be easier than you think to pull off this luxury pool vibe!

Expert Tips:

  • Nothing says exotic like firey displays. So use tiki torches or a feature firepit to heat up the party!
  • Color-changing LED accent lighting transports your party anytime! Bring in island blues, pinks, and greens with a touch of a button.
  • Use highlighting techniques to bring your tropical trees and flowers into the experience.

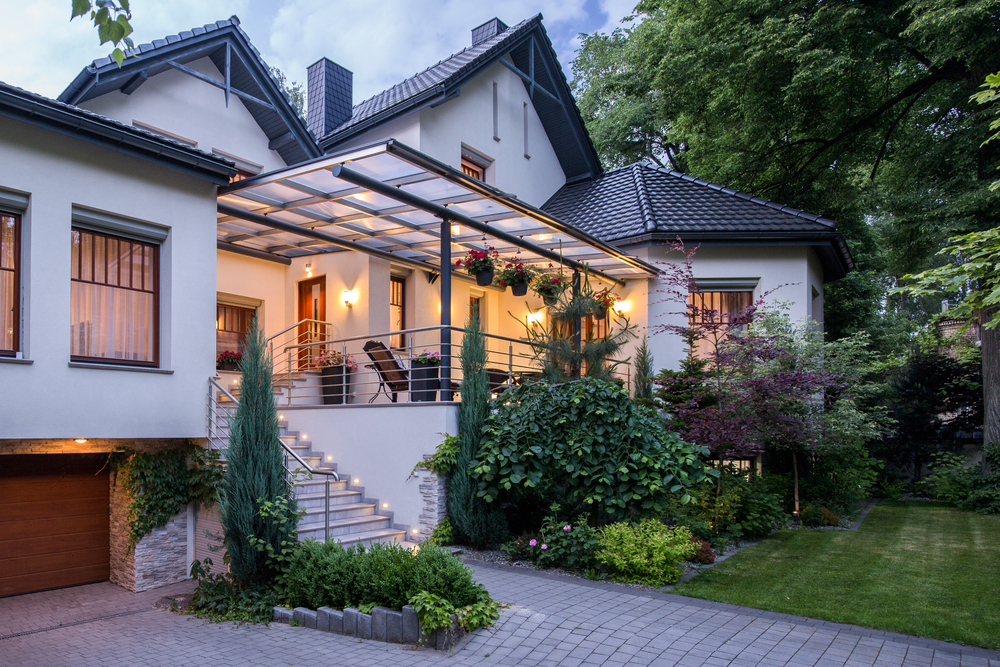
Brighten Surrounding Architecture

Your pool may be the center of your backyard entertainment– but the surrounding architecture of your home, gazebo, or pool house is the backdrop. Don’t let your unique architecture go to waste when the lights go out. So pull the rest of your home into the pool experience with your pool upgrade!

Expert Tips:

  • Highlight arches and beams to show off beautiful architecture around the clock. You can install small spotlights, use recessed lighting, or play with string lights for a custom look.
  • Downlighting or Uplighting? You can position accent lights to shine down walls or use ground lighting to literally light up your home exterior.
  • Brighten doorways. Direct guests and family members to the right places with beautiful sconces or spotlights.

Need Help?

Proper lighting is essential to a fully functioning home– but it can be challenging to nail balanced brightness, great fixtures, and a budget! Contact the experts at One Stop Lighting for advice on your project!


Keywords: pool renovation, upgrade your pool, luxury pool

Top Tips to Lighting Every Room of Your Home

Many homeowners fall into the trap of relying on paint and mirrors to lighten up a room. While these are tricks that work, they’re just bandaid fixes that ultimately limit your design options. One of the best ways to make your house a home is to have great lighting in each room. And just as every room has a different function, and they all have their own lighting needs. 

Don’t worry, it’s not as complicated as it sounds! Getting the best lighting set up is almost always a simple undertaking, and this is something that can be done on any budget.

Set aside some time to do a tour of your home, looking specifically for places where your lighting just isn’t doing you any favors. To help you out, we created a checklist you can use to find what’s missing. 

  • Front Exterior
  • Entry
  • Living Room
  • Kitchen
  • Dining
  • Bathrooms
  • Office
  • Bedroom
  • Backyard

Front Exterior

The front of your house carries a lot of weight. It’s what you drive up to, what your friends and family see first, and plays a big role in your relationship with your neighbors. It also is the first line of defense against intruders. If your curb appeal is lacking, look for these things:

  • A well-lit door: What’s better than coming home to warm, golden light washing over your front door? If your exterior feels dim or dingy, you’d be surprised at how dramatic a transformation you’ll get when you replace the fixtures by your door.
  • Sidewalk lights: Keep you and your visitors safe with sidewalk lights leading to and from your home. They also add a little fairy light magic to your home!
  • Motion sensor flood light: Any motion sensing light is a great way to increase your home’s safety. Flood lights are an added bonus, as sudden bright light usually scares off intruders – whether human or pest.

Entryway

Crossing the threshold is an important moment. When you walk through the door, you’re looking for a place to relax and be yourself after work, running errands, or shuffling the kids to activities. Your entryway sets the tone for your home for you and your for your guests – don’t skip out on the lighting in here! 

  • Buffet table catch-all: Use a lamp on a buffet table to make it easier to take off shoes after a late night. Small space? Use reflective finishes to add some extra light.
  • Smart lighting for smooth entry: Smart bulbs can be set to a schedule to keep your entryway ready at all times. Some can even turn on automatically when you arrive, or respond to voice commands when your hands are full.
  • Wall/Ceiling Lights: If your entryway feels to dim or too harsh, try swapping out the bulbs in your fixtures with LEDs with a different lumen count (measures brightness) or a different light “temperature”. (Warm/soft white bulbs make you feel cozy and comfortable, and bright/daylight bulbs will make you feel alert.) Some smart bulbs can even switch back and forth with the help of a small remote or a smart home hub.

Living Room

Your living room is the hub for comfy entertaining and family relaxing. You need it to be well-lit but still cozy. Consider these:. 

  • Ditch boring fixtures: You living room is a great place to choose more decorative fixtures. Find something that speaks to your soul and swap it out. It’ll instantly boost your mood every time you walk into the room! 
  • Mood lighting: Nail mood lighting by making sure you have light coming from more than just a single overhead light. Lamps and sconces shine a quiet, cozy light when the main light is off – perfect for a relaxing evening at home.
  • Media lighting: Movie nights are core memories – but staring at a screen in a dark room is hard on your eyes. For the film aficionados and gamers alike, we recommend either backlighting your TV with an LED strip light or keeping a couple of dim lamps around.

Kitchen

Your kitchen is the heart of the home, used for both focused work and for entertaining. That means you need to pay close attention to light layering so you can quickly flip from one function to another. 

    • Task lighting: Bright lights are necessary for safe cooking! Light your countertops with island pendants and LEDs under cabinets lights to improve your accuracy while dicing and sauteing. 
    • Dimmable lights: Late night snack turned heartfelt conversation with cocoa? Install dimmable lights so you can create a space for more intimate moments that’s away from harsh lighting. 
  • Light up your cabinets: Want to make your cabinets look high-end without high-end work? Use LED strip lights inside glass-fronted cabinets for a curated look, or put LED pucks on top of the cabinets to reflect light upwards and make the room feel bigger. 

Dining Room

Have you ever noticed that most restaurants are pretty dark? That’s because people talk more, eat slower, and stay longer in a relaxed atmosphere. Recreating this ambiance in your home is sure to make your meals more enjoyable. 

  • Comfy Cozy: Use warm bulbs in your fixtures to create a cozy vibe. Look for bulbs that say “soft white” or that are less than 3000K. If it’s in the budget, swap out that flush mount light with a chandelier or pendants light-filtering shades to wash your space with soft, warm light.
  • Try candles: Adding candles is a quick and easy way to soften the space and increase the feeling of closeness. For apartment dwellers or those with young children, battery-powered candles are a great flameless alternative.
  • Keep it separate: If your dining room is close to your kitchen, turn off the kitchen lights once you’re ready to eat so that your dining table is the center of attention. 

Bathrooms

Bathrooms play multiple roles, so they need to have clever lighting. On the one hand, they are “get ready central,” where true light is critical to having great makeup and a clean shave. But, on the other hand, they are also a relaxation hub, where harsh lights won’t help. 

  • Bright lights for mirrors: Replacing the light above your mirror is a fast and simple project that will make a huge impact on both the functionality and overall appearance of your bathroom. Use bright, cool lights for the best makeup application and cleanest shave.
  • Warm light for relaxation: Use warm light over tubs or showers to help you relax in the water after a long week. No lights over the tub? A warm night-light or set of LED candles will give you the same feeling!
  • Use multiple light switches: You can easily custom control the lights for each activity. 

Home Office

Spending a lot time in the home office these days? Your office lighting impacts the quality of your work, so take a minute to assess what you need to do your best.

  • Update your overhead lighting: Get rid of that builder-grade light and put in a cool chandelier or pendant to jumpstart your creativity. 
  • Modern deks lamps: Make sure you have plenty of light for your workspace with a great lamp. If you’re on video calls often, try shining the light on the wall in front of you rather than directly on your face – it’ll bounce back and give a softer light that’s easier on your eyes.
  • Create a designated recharge area: Set aside a corner in your office to take a few breaks during the day. Get a comfy chair and soft lighting so your brain can rest and recharge between meetings. 

Bedrooms

Your bedroom is your place to relax, unwind, and get a full night’s rest. However, the lighting in your room will significantly impact your ability to shut off your brain and get deep into that REM sleep. 

  • Prepare for rest: Blue light (like the light from daylight LEDs and from phone or TV screens) will keep your brain awake, so avoid blue light sources for 1-2 hours before bed.  Use soft, warm light bulbs only in your room! 
  • Be careful with tech: We’re strong believers in mood lighting – but those tiny LED lights on power cables, alarm clocks, speakers, etc. are not it. Remove what you can, and cover the rest with dimming stickers.
  • Lighting you feel: Focus on how you feel. Swap out old fixtures or lamps that you don’t love with something that you’ll enjoy seeing every night. Too warm? Replace your overhead light with a ceiling fan so you can rest comfortably.  

Pro tip: It’s okay to use brighter, whiter lights in your closet so you have a place to check the true colors of your outfit before you head out for the day. 

Backyard

Once you’ve walked through each room, don’t forget to check your outdoor space! Whether it’s a big suburban yard or a small 5th floor balcony, it should be a great place to spend long summer nights while keeping you and your family safe. 

  • Bring the magic: Fairy lights or string lights feel like a luxury, but they’re actually really affordable and easy to hang. They’ll bring a little bit of magic to your nights whether it’s an evening party with friends or a backyard campout with the kids.
  • Proper lighting for activities: Make sure your yard has adequate lighting for all of the ways you use it. Install flood lights in active areas like basketball hoops. Put in a row of solar path lights along walkways.
  • Exterior lights: If your patio is too dim, it might be an easier fix than you realize. Replace that tiny, old wall sconce light with a modern fixture. If you need lots of light – opt for a fixture with multiple bulbs and/or clear glass. 

Don’t Stress It

Great lighting is an essential part of a well-designed and a fully functioning home – but it can be challenging to nail balanced brightness, great fixtures, and a budget! The biggest thing to remember, TL;DR of it all is that you need to have multiple sources of light in each room. Lamps and smart bulbs are your friend! 

If you want some help getting it right, contact the experts at One Stop Lighting for advice on your project! Lighting is what we do – so we’re not going to toss you the closest box off a shelf and say “have at it!” If you’re not happy with your home’s lighting, we’ll help you find what’s right for you. 

Home Lighting and Interior Design 101: Top Interior Design Tips From The Lighting Experts

Have you ever walked through your home and wondered, “why did my stuff look cuter online/in-store?” If you have, there’s a decent chance the problem is your home lighting. Product images and store displays always have excellent lighting, showing you the best possible version of their decor, paint samples, art, and furniture. 

But if you buy that gorgeous piece or perfect paint color and put it under poor lighting, you’re bound to feel like you got duped.

Luckily, the rules to great lighting aren’t very complicated! You can start updating your home lighting for relatively low cost, low skill, and low tools. 

Consider this post a free course on home lighting essentials, including practical interior design tips from lighting experts. Answer quiz questions along the way to see if you’ve got it, then apply what you learn to make your interior design shine!

The Basics

Let’s start with a few basic terms and ideas– including five layers of great lighting and why the bulbs you use significantly impact how your home reads.

Layers of Light

You can break up your home lighting into five different categories. Once you understand how the categories work, you can mix and match them to fit your needs. Here are the five layers you should consider in each of your rooms:

  1. General/Ambient: the primary light source for the entire room.
  2. Task:  more focused light over a workspace, like a kitchen island or desk.
  3. Accent: think mood lighting; creates an atmosphere rather than light up the whole room.
  4. Decorative: it’s more about what the fixture adds to the overall design than the light it gives.
  5. Natural: working with windows (and firelight) to maximize color and space.

We’ll break down tips for working with each of these layers later on. For now, keep in mind that a well-lit room typically has five to seven light sources spread across these categories.

Question 1: Which type of lighting is most responsible for setting the mood in your space?

Warmth of Bulbs

There is so much information available on bulb temperature. The truth is you can get started with just a few pieces of information. First, bulb temperature refers to the color and brightness of the light. So let’s break it down.

Cool light will wake you up, help you focus, and is best for showing the true colors of paint, makeup, and clothing. These are the bulbs in the bottom row of the image above. Cool bulbs are great for offices, kitchens, and vanities.

Warm light has the opposite effect– it relaxes and casts a yellow or orange glow on your walls and furniture. Warm light is perfect for bedrooms, living rooms, and dining areas.

Both ends of the spectrum are important for different areas. And sometimes you might need to combine them in the same room so you can control the activity you’re doing. 

Now, let’s get into some specifics about how to work with each of our five light categories.

Question 2: Which light temperature is best for relaxing, cool or warm?

General or Ambient Light

As stated earlier, general or ambient lighting is your primary source of light for your space. It’s often centered in the ceiling so it can cast a bright, even light across the room. Your light fixture will greatly impact how the light casts. For example, flush mount domes offer little resistance to light, while metal shades will concentrate light downwards.

Since general lighting gives the most light, it will set the tone for your space. Here are a few top tips for nailing the general lighting in your home:

  • Use cool ambient lighting for kitchens, offices, and bathrooms.
  • Use warm light for living rooms, dining, and bedrooms. 
  • Swap out your builder-grade flush mount for an immediate (not to mention cheap and easy) upgrade. 

Question 3: Where should you position your general light source?

Task Lighting

Task lighting concentrates light (and your focus) on important tasks, like homework, dicing up vegetables, and filling out expense reports. They are also more obvious choices in your design since they often hang down or sit close to the action. 

Top tips:

  • Hanging pendants often look best in odd numbers, so stick to one, three, or five pendants where possible.
  • Strip lights or spotlights tap into task lighting fixtures to highlight art or displays to create design focus. 
  • Don’t forget LED strips as a versatile option! Place them around mirrors and under cabinets for steady, bright light.

Question 4: How do you know what areas need task lighting?

Accent Lighting

Accent lighting covers mood lighting and rounds out the lightscape. From reading lamps to LED strips behind TVs, they land closer to decorative lighting than really focusing on function. 

But don’t underestimate what they deliver! Accent lighting easily becomes general lighting during movies, date nights, and intimate gatherings with friends and family. 

Top tips:

  • Warm light is usually best for accent lighting. Scatter a few accent light sources around gathering places to have enough light to fill the room without the general light source.
  • Sconces are a great way to switch up typical lamps. And some come with plug-in cords– no hard wiring needed!
  • Color-changing bulbs and LEDs are a great option for accent lights. Then they are versatile for task lighting or mood lighting as the situation requires!

Question 5: True or false? If I want to add accent lights to my home, I have to hire an electrician.

Decorative Lighting

The final category is sometimes lumped in with accent lighting since they both have more to do with aesthetics than functionality. But we pulled this out to give special attention. 

Decorative lighting is about adding a super cool fixture, with the provided light taking a backseat. For example, using a chandelier for general lighting offers general light for the room, but its top priority is providing a visual “wow.”

  • Try mixing up the expected, like using pendants or sconces where you’d normally use a lamp. 
  • Get creative and turn a statue or other thrift finds into a one-of-a-kind light source.
  • Work with a local light showroom for designer-level pieces for a fraction of the price– plus top tips on installation and more!

Question 6: What is the purpose of decorative lighting?

Natural Light

Natural light is the final component of your lightscape. While manipulating natural light isn’t as easy as shopping for a great light fixture, it’s still critical to the overall feel of your home. 

For example, when shopping for paint, check the swatches day and night to see if there’s a dramatic change in appearance. This will also inform your decision on what kind of bulbs you use. And if your room’s color changes a lot from day to night, you can use cooler “daylight bulbs” to keep your color from changing as much. 

Top tips:

  • To get an airy feeling, use light curtains and hang them as close to the ceiling as you can, regardless of where your window stops. 
  • Which way do your windows face? You’ll get very different glows north versus south, as north-facing windows tend to get cooler light, with south-facing windows giving warmer light. Work with the natural light temperature when picking paint colors and decor!
  • Remember, dark colors absorb light, and lighter colors reflect it. So if you want a dark, moody space, dark paint will help to suck in extra light while still getting to keep the windows open. 

Question 7: True or false? Paint colors always look the same, no matter the time or the way windows face.

Summary

With a basic understanding of these simple lighting and interior design principles, you’re ready to convert your home from predictable and dull to vibrant and glowing! Remember:

  • You need all five layers of light to pull off a great room design.
    • General: main light source.
    • Task: focused light on important activities.
    • Accent: set the mood.
    • Decorative: dress it up, make it unexpected.
    • Natural: work the windows.
  • Bulb temperature affects concentration and color interpretation. 
    • Cool light for true colors and enhanced focus. 
    • Warm light for cozy relaxation and a golden touch to color. 
  • Updating your lighting doesn’t have to be complicated. Work with local professionals to get a leg up with great selections, expert advice, and affordable prices.

Need Help?

Proper lighting is essential to a fully functioning home– but it can be challenging to nail balanced brightness, great fixtures, and a budget! Contact the experts at One Stop Lighting for advice on your project!

—

Quiz Answers:

Question 1: Which type of lighting is most responsible for setting the mood in your space?

General (ambient) lighting is a room’s main light source, so it’s the primary contributor to the mood.

Question 2: Which light temperature is best for relaxing, cool or warm?

Warm light naturally relaxes your brain and helps you to fall asleep. Cool light wakes up your brain for detailed work.

Question 3: Where should you position your general light source?

General lighting should come from as high and centered as possible for even light distribution.

Question 4: How do you know what areas need task lighting?

If you have an area where you perform detailed work, you should check to see if you need task lighting! Ambient lighting can provide enough light, but focused work often requires focused lighting.

Question 5: True or false? If I want to add accent lights to my home, I have to hire an electrician. 

False! There are many options for battery-operated and plug-in accent lighting.

Question 6: What is the purpose of decorative lighting?

Decorative lighting works with your decor as art, giving a unique lift to your design. It’s one more detail that helps you show off your style!

Question 7: True or false? Changing your lighting will change your paint colors.

True! All colors change with the quality of the light shining on them. Window position, time of day, and bulb temperature will all change how your paint reads.

3 Top Mistakes in Outdoor Lighting and How to Avoid Them

Your home’s outdoor lighting makes your home safe, creates mood lighting, displays your personality, and more! And while there are many excellent ways to light your home’s exterior, there are so many ways to make mistakes. 

Poor outdoor lighting might just make your home boring after sundown. But in other cases, improper outdoor lighting can create real hazards for your home!

We’re here to give you some advice from lighting experts. We’ll walk you through three of the most common outdoor lighting mistakes people make and how to avoid them. Then you’ll be able to safely enjoy your home at any time, in any season!

No More “Starry Night”

Have you ever looked outside in the countryside and noticed how many stars there are? Especially compared to when you’re strolling at night in the city? But, of course, it’s not because there are more stars in the countryside– it’s because all the city lights create significant light pollution. 

Light pollution refers to the interference of electric light with natural light, like stars and the moon. If you use too much outdoor lighting, you may unintentionally worsen your view of the night sky. 

Here are a few top ways to avoid putting out too much light and keep your nights starry:

  • Use motion sensors or automated timers. One way to reduce light pollution is to only have the lights on when you need them. By using motion sensors or timers, you can keep your electric light to a minimum without sacrificing safety or functionality.
  • Keep your lights relatively warm and dim. Bright lights emit a higher frequency of light, which leads to greater light pollution. Think of cities and how all those signs and street lights cause a haze. So, warmer, dimmer lights, like solar path lights and fairy strings, will help clear the air. 
  • Use downlighting. Downlighting is an excellent lighting technique that focuses light beams toward the ground. Try using lampshade sconces or other fixtures that concentrate light in a single direction. This strategy will allow you to light your yard while keeping the starry sky bright.

Can’t Take the Heat… Or Rain

Outdoor light fixtures and wiring must withstand water, ice, snow, wind, and animals. But not all fixtures are up to the task! Some homeowners simply pick a fixture or bulb they like without checking for outdoor grading. Using indoor grade lighting may get damaged by rain and snow or be vulnerable to animal teeth. 

Carefully shop for fixtures and bulbs so you can balance your aesthetic with durable, quality equipment. When in doubt, try running over to your local light showroom for expert advice on a safe and beautiful home exterior.

Keep your outdoor lighting safe from the elements and pests:

  • Use only outdoor grade fixtures, bulbs, and wiring. Read all instructions carefully to ensure that you’re keeping yourself (and your outdoor lighting) covered!
  • Location, location, location. Pick strategic places for your lighting to reduce exposure and risk. For example, you can tuck them under eaves, keep them away from drainage routes, and leave lots of space between lights and trees.
  • Inspect lighting regularly and after significant weather. Check on your outdoor lighting at least once a year to see if you can find damage or wire exposure. It’s also a great idea to do a quick check if you have a severe storm!

Leaving Things “Plain Jane”

While the house in this picture seems beautiful, we’re not really sure because all of its features are hidden in the dark. But your home shouldn’t become “Plain Jane” just because the sun went down! That means you’ll need to add more lighting than what you’re getting with the house from the builder. 

Let your home’s personality shine around the clock by:

  • Using enough light sources. Interior design recommends using 5-7 light sources per room. You can use the same principle for your home’s exterior! Your standard porch and garage sconces will only cover half your lighting needs. Don’t want to install fixtures on your home? Try using ground light sources like LED pucks or ground lamps! 
  • Create a story. Lighting lets you say more about your style– are you classic, magical, or dramatic? What about luxurious, mysterious, or modern? The outdoor lighting you use will help you create a unique view of your home, even in cookie-cutter developments. 
  • Incorporate safety. Start with walkway lamps, lighting stairs, or highlighting danger zones like pools or ponds if you’re having trouble knowing where to begin your outdoor lighting upgrade. Then you’ll cover the essentials and add some personality too!

Special note: Dressing up your home with light often creates light pollution. So keep your balancing act in mind if you’re a regular star gazer, and ensure that you can easily control when your decorative lights are on. Your local lighting showroom is a great resource for tricks to balance opposing needs!

Need Help?

Proper lighting is essential to a fully functioning home– but it can be challenging to nail balanced brightness, great fixtures, and a budget! Contact the experts at One Stop Lighting for advice on your project!


Decorating a Gorgeous Entryway – 5 Insider Tips You’ll Have to Steal

A front entryway can say a lot about a home! When guests walks in, they know what to expect by the mood you create. Is it elegant or casual? Is there a spot for them to put their shoes and coats, or do they leave them on? Is it well-lit or is there a moody ambiance? No matter the mood you choose, make sure you’re intentional about it!

With a few tips and some inspiration from us, your entryway can say classy, comfortable, modern, or fashionable. They say not to judge a book by its cover, but if we were allowed to judge houses by their entryways, the rest of the rooms would be sure to deliver on beautiful design.

1. Rethink Your Furniture

One of the trickiest parts of styling a front entry is using the space effectively. If you have a roomy entryway, you may have room for a lot of furniture. With a smaller entryway or hall, however, you’ll have to be careful what pieces you choose to include – each one will count!

Benches

A bench is an entryway staple! It provides you and your guests with a spot to sit down while putting on shoes and can even offer storage (depending on what you get). These benches are just as pretty as they are practical.

This furniture has a small footprint that would fit even the smallest space! Since the bench doesn’t have built-in storage, there’s a basket for storing shoes or other outdoor accessories. The matching coat rack is functional and space-saving. Throw in a circular mirror for a quick hair check before you walk out the door, and you’re done!

This entryway couldn’t be any cozier! Adding a soft pillow and a blanket to a seating area is a simple trick to make any space feel homey. The only things we’d add are some hooks above the bench for coats and a spot for the shoes that are guaranteed to end up everywhere.

Entry Table

After adding a bench, next on our priority list is definitely an entry table. They can give you extra storage, show off your style, and are a great place for some accent lighting.

This entry table will fit in any space and the baskets give you some storage for your kids’ mess of winter accessories! Adding a couple of lamps on top is always a smart choice, too. They’ll light up your decorations and make them a focal point. The coordinating runner and artwork in this entryway are worth highlighting!

We love the clean lines and neutral-toned wood of this table. The decor is amazing and there’s tons of storage! Neutral books, a vase, a lamp, and a couple of knick-knacks are proportionally perfect.

This entryway is dripping in originality. Instead of using a traditional table, this homeowner chose a small dresser – genius! When you have less space to work with, every piece of furniture matters. Choosing a dresser with drawers ensures you have a place to toss any mess without going to any extra effort.

Built-In Furniture

If you’re looking for a storage solution that’ll contain any mess, creating a mud room-style entryway with built-in furniture will give you more storage than you’ll know what to do with!

When you’re coming back from a long day, the last thing you want to do is take a trip all the way to your room to put away your things. Instead, create a one-stop shop for your everyday items. Hooks can hold backpacks, purses, hats, and jackets. Shoes can be stored under the bench and anything else can go in the baskets above.

Built-in furniture doesn’t have to take up tons of space to be effective! This entryway has all the room you need for storing your essentials. This modern entryway is gorgeous, but we’re obviously giving our gold medal to the stunning light fixture that completes the look.

2. Update or Add Lighting

Speaking of lighting, no entryway is complete without it! From chandeliers to lamps, we have all the styling tips you’ll need to make your entry shine.

Chandeliers

A big entryway with high ceilings calls for a chandelier – the space will feel empty without it. This chandelier will wow your guests from the moment they walk in the door!

This entryway’s door coordinates perfectly with the chandelier they hung! Because the door and chandelier have such warm tones, the gray and brown hexagonal tile was a great choice to cool off the look, while still tying in the warmth. The huge mirror on the wall is also a smart choice because it’ll reflect light, giving this homeowner the most possible lighting for their dollar.

Your entryway doesn’t have to be 16 feet tall to hang a chandelier! This front room’s fixture makes the space ornate and delicate – like something out of a Jane Austen book. Chandeliers can make a statement in any space – just be sure to hang them properly so you don’t run into them!

Chandeliers make any space feel luxurious, but there’s something especially stunning about the way this one hangs over a baby grand piano. You can picture a family gathered around the piano singing carols on Christmas Eve with chandelier’s light twinkling on them – pure magic!

Lamps

A floor lamp is a great way to add dimension and height to your design. This one provides focused lighting for putting on your shoes and coat before you rush out the door. We also love the organization of the shelves in this entry.

Lighting doesn’t have to be complicated! Adding a basic table lamp is a low-effort way to make a big difference in your design. It flows seamlessly with the other tabletop knick-knacks, but it’s also practical.

Sconces

The indoor sconces in this entryway are a smart solution for lighting that won’t take up loads of extra room. This homeowner even added a mirror that will reflect some of that gorgeous light!

This creative entryway’s sconce is modern, chic, and well-placed. Accent lighting is key to making your life easier. No more fumbling around in the dark to tie your shoes or buckle the strap on your heels!

3. Get a Rug

A rug is an anchor for furniture that would otherwise float! Since the entryway is a heavily-trafficked area, a rug can also help protect your floors. They’re easily replaced while flooring is, well…not. 

This brown rug makes this home’s entry area feel cohesive. Without it, the room would feel more like a collection of random furniture! Its neutral color makes it a great piece to keep around even if you switch out furniture.

This jute rug brings warmth and texture to a room otherwise lacking both! It also adds a flair of bohemian that we’re loving.

4. Hang a Mirror

Mirrors are one of our favorite design hacks. They reflect light, make a space look bigger, and are perfect for entryways.

You can’t go wrong with a big round mirror! The black finish on this ties in with the basket and pillow nicely. It’s a piece you won’t regret buying.

This pretty floor-length mirror is in the ideal place for a last-minute outfit check! Do those shoes really work with your outfit the way you thought they would? A quick glance in this mirror and you’re set to go.

A check-the-outfit station is a must-have in an entryway. This arched floor-length mirror is also perfectly placed to reflect natural light from the window and light from this cute pendant.

A classic circular mirror is also a great last-minute stop to make sure there isn’t any breakfast in your teeth! We also love the creativity of the shelving unit here.

5. Get Creative

Possibly the most important tip we can give is to be creative! Every space is a little different so there isn’t a one-size-fits-all when it comes to designing an entryway. These spaces radiate creativity and may give you a few ideas for decorating yours.

When your real estate is less of an estate and more of an apartment, you have to use every inch wisely! The bench and hook shelf combo serves the function of a hallway tree, but is a bit smaller and could be partially DIY-ed to save money. To get even more creative, this homeowner could replace the clock with a mirror and a floor lamp for more dimension and lighting.

This adorable entry uses a garment rack to store shoes and coats. Practical, but still pretty especially if you don’t have a coat closet. The wood tones match the bench and frames and the plants bring in some life!

Creativity and boldness go hand-in-hand. If you’re feeling brave, ditch the neutrals and pick a bright color palette that’ll attract some attention. Go bold, go home, or pick door number 3 and go bold at home!

This space is about as creative as it gets! A sideways ladder-like coat rack looks like something a handy homeowner could DIY. This bench looks like it was also DIY-ed – maybe out of old shutters? Whatever it is, it’s a crafty way to give you a bench with storage underneath.

We’ve got one word for this picture: mood. Instead of picking light and bright colors, try out a richer, moodier color. Nothing will take your entryway to luxury faster than picking a darker color palette! We love the contrast of the gold lamp and sunburst mirror against the gray in this one.

Another clever way to create an entryway is to dedicate a corner in your front room as your entry zone. Putting a rug down makes it feel like a cohesive space, then adding an entry table and bench seals the deal. This space also has some built-in shelves we’re obsessing over! They add a trendy touch and the decorations can be switched out whenever you get bored.

—

When you’re ready to get started decorating your entryway, we’re here to help. Come visit One Stop Lighting for some more expert advice! With our help and these 5 tips, you’ll have a front entry everyone will envy!

12 Simple Bathroom Updates You Can Do Yourself

Bathrooms are spaces that often go overlooked, but when they’re spruced up, they add some serious value to your home! Remodeling can take loads of time and effort (not to mention money), but giving your bathroom a facelift doesn’t have to. These simple tips can give you the bathroom of your dreams.

1. Organize

The last thing you want to deal with at the beginning and end of your day is CLUTTER. Give yourself the gift of a good system! Containers may seem unnecessary, but when you’re rushing out the door, it saves you a headache to just have an easy home for all your toiletries.

2. Add Greenery

Plants bring life, peace, and tranquility into a space. This bathroom would be the perfect escape from the stress of everyday life. The warm tones mixed with the green tell you to relax and take a break. Who are you to tell them no?

3. Change the Hardware

Arguably one of the easiest ways to take your bathroom from the early 2000s to today without spending a fortune is changing the hardware on your cabinets. Finish options are endless! The bathroom above uses gold accents to create a cohesive look with a modern feel.

4. Spruce Up the Walls

If you’re looking for a simple way to make a big impact in your bathroom and have a free weekend coming up, a fresh coat of paint and some elbow grease will make your bathroom feel like a brand new space with just a few hours of work! 

Want to take it to the next level? Bold wallpapers are in, and they really let you show off your personality! This bathroom incorporates the best of both worlds with a simple, painted board and batten wall on the bottom and wallpaper on top! It’s not as hard as it looks – check out this quick tutorial!

Renter-friendly option: Removable peel and stick wallpaper will give you the same look without having to commit long-term. Love the board and batten? There’s a renter-friendly tutorial for that too!

5. Update Mirrors

Bathroom mirrors are often neglected, but they totally change the feel of the room – don’t leave them out! These wood-framed mirrors bring warmth to this bathroom’s design and help to balance out all of the cool tones and polished finishes. 

Renter-friendly option: If replacing your mirror is out of the budget or you’re renting, adding a wood frame to an existing mirror is an easy one-weekend DIY project – just make sure you can easily remove it if you’re renting!

6. Paint Your Cabinets

Painting your bathroom cabinets may take a little effort, but it’s a great way to unify your space or to add a fun pop of color your bathroom. With just a small can of paint and some time, you can take your bathroom from basic to beautiful, even with a low budget. This bathroom’s painted cabinets help to ground the space, and provide much-needed contrast that takes the design from bland to balanced.

7. Replace Old Light Fixtures

Replacing a ceiling or wall light in your bathroom with a modern fixture that’s more your style will give the entire room an instant style boost! You don’t have to play it safe here – find a fixture you love and jump in! We love the way this bathroom shows some serious creativity with these pendant lights that highlight this AMAZING wood accent wall. 

Many homeowners are wary of swapping out light fixtures, but it’s usually a pretty simple DIY. We recommend starting with your vanity light first if you’re on a budget – great front-facing light by the mirror will make the biggest impact on your morning routine!

8. Layer Your Light

Every room in your house should have several light sources to make it feel more comfortable and eliminate harsh shadows and dark corners. In a living room, that’s as easy as tossing in a few lamps, but layering light in a bathroom can be a little trickier.

This bathroom uses a combination of pendant lights and recessed lights to make the whole space feel bright and airy. If your bathroom lighting isn’t working for you, installing an extra wall or ceiling light is the best way to go from dark and dingy to light and bright. 

If your bathroom’s already finished and rewiring isn’t in the cards – don’t worry! Fortunately, there are a lot of easy do-it-yourself options out there. 

LED light strips like the ones in this bathroom are inexpensive and as easy to install as a sticker! They’re usually used behind the mirror or under cabinets, but they can go anywhere you want some extra light. 

You can also replace a light switch or outlet cover with one that has a built-in light – no more blind fumbling for a switch in the middle of the night.

Renter-friendly option: Get a motion-sensing plug-in outlet light or a rechargeable countertop light! These are both non-permanent ways to add a layer of light and keep yourself from bumping into the counter in the dark.

9. Update Faucets

Another way to update the look of your bathroom and conserve water is by switching out your faucets. Look for a faucet with a WaterSense label to reduce your sink’s water flow by 30 percent or more. Less water flow means a lower water bill. With a lower water bill, you’ll have some extra change in your pocket to take your family out for dinner (or yourself–you deserve it!).

10. Dim the Lights

The lights in this bathroom make it a retreat from chaos. When you want a calming bath, dim the lights for optimal relaxation. Dimmable lights give you the flexibility to turn your bathroom into a spa.

Bonus points: Since dimmable lights are more energy-efficient, installing a dimmer switch will leave you with extra money to do more with your bathroom!

Renter-friendly option: Use other lower-light options like strip lights, countertop lights, or LED candles like in the bathroom above.

11. Add a Backsplash

The metallic accents and painted vanity in this bathroom are to die for, but what really makes this space magic is that classic backsplash. Not only does it breathe new life into this space, but it also protects the wall from moisture and staining, so you won’t have to worry about mold or mildew. With a little DIY magic, this bathroom feels complete!

Renter-friendly option: Use a peel and stick backsplash instead! It’ll look like tile without actually being permanent.

12. Update Your Tile Floor

While tile may be a bigger time or money investment, this bathroom clearly shows that it pays off. If you’re wanting to update the floor, choosing a unique tile like this is the way to go. Pro tip: while real tile will give you the best result, you can actually use a stencil to paint your floor. It will give it the same look for a fraction of the cost!

Renter-friendly option: Use removable flooring (peel and stick) to look like custom tile, or cut a vinyl piece to fit the size of any existing tile.

————–

Don’t let your bathroom fall between the cracks any longer! When you’re ready to take it to the next level, give our experts at One Stop Lighting a call. We’d love to help you get started and give you more tips like these.

Kitchen Light Fixtures 101

Whether you’re building or renovating, understanding your lighting options and making smart choices will completely transform the way your kitchen looks and feels.

Keep in mind – your kitchen will look best with multiple types of lighting! One light overhead just won’t do the room justice – and it probably won’t give off enough light to cook safely. Your best bet is to go with a mix of ambient (overhead, general lighting) and task (specific to place or purpose) lighting to make your kitchen both beautiful and functional.

 Here’s a quick guide to the different types of light fixtures you’ll find in kitchens.

Pendants

Pendant lights hang down from the ceiling, and typically only have one bulb. They’re most often used over countertops like a kitchen island or peninsula. Pendants come in a huge variety of colors, shapes, and styles.

Recessed

Many modern kitchens now include recessed lighting. Recessed lights give off great light without having a fixture in the ceiling that blocks the view and needs dusting. Recessed lights can be used all over the ceiling to create general ambient light, or placed over countertops to create task lighting for chopping and cooking.

Chandelier

While this look may not be for everyone, for those who love having some extra sparkle in their kitchen, a chandelier is an excellent choice. A chandelier is a light fixture that hangs down from the ceiling and has multiple lights that shine out and around the room.

Skylight

Okay, so this might not be a light fixture, but this type of kitchen light is unconventional in the best way possible. When combined with other light fixtures, a skylight makes a stunning statement that earned it an honorary place on our life. A skylight is, essentially, a window in the ceiling or roof of the house. It lets natural light flood into the room, filling it with bright white light. While they may only be “useful” during the day, they’re a beautiful addition to any kitchen. 

Under-Cabinet Lighting

These tiny fixtures pack a powerful punch! Mounting lights underneath your wall cabinets will brighten your countertops, making it an easy place to prepare food. They’re also a great addition for late-night snacking – they give off enough light to see in the kitchen without having to be blinded by the full power of the ceiling lights. Under-cabinet lights come in a lot of shapes and sizes – you can get small, individual lights like these, or strips of LED lights that give off an even glow. Many are battery-powered, so they’re easy to install – but you can also have them hard wired to a switch (our favorite option!)

Cove Lighting

If your kitchen has a beautiful coved ceiling like this one, adding a small strip of inexpensive LED lights around the interior of the structure can create a beautiful, high-end look for next to nothing. 

Ceiling Fan

While it may not be the first thing you think about when you hear “kitchen lighting” – a ceiling fan can be a great choice for the kitchen! It’s most commonly found in kitchens with high ceilings or in large great rooms (spaces that combine kitchen, dining, and living areas) to help keep air circulating and comfortable across the larger space. It’s also the perfect option for outdoor kitchens to help keep insects at bay while you’re preparing and enjoying your meal.

———-

Regardless of which fixtures you choose for your kitchen, as long as you make sure that your countertops are well-lit and the light levels are comfortable for the way you use the room, you should be in great shape to enjoy your kitchen for years to come. 

If you’re not sure which fixtures would be best for your kitchen, or if you need help arranging your fixtures in the best positions for your space, stop by our showroom and chat with one of our lighting specialists! We’ll give you expert advice tailored to your room and help you get on your way to lighting your home just the way you like it.

10 Creative Ways to Style Your Hallway

Do you have a hallway that feels disconnected from the rest of your home? Does it feel like dead space that could be more useful or interesting, but you’re unsure what to do?

We get it. Hallways can often be long and dark and usually have little open wall or floor space. But that doesn’t mean it has to be dull, dead space!

This article will cover ten ways to brighten up your hall, so you can love walking through your entire home. Of course, not everything will fit in every hallway– but remember that great design is all about layering. Try mixing a few elements from this list to get a polished, inviting hall or entryway.

1. Paint

Changing up the color palette of your hallway is an easy way to create interest– without taking up space. You can paint the walls your favorite color, get an exciting runner rug, or install a cool light fixture. This strategy is sure to surprise your guests and make the walk to your room much more enjoyable.

Why you’ll love it:

  • Great for small spaces
  • Few tools and no special skill sets
  • Inexpensive

Need help choosing a color? Then use color psychology to match the vibe of where the hall leads. 

2. Patterned Wallpaper

If painting isn’t your thing, or if solid colors just won’t cut it – then try mixing it up with patterns! It’s a great way to add dimension to a room. Wallpaper is an easy way to refresh your walls (or doors) without needing much skill.

Why you’ll love it:

  • Endless choices, from minimalist to maximalist
  • Wallpaper selection for all skill levels
  • Faster than custom paint jobs

Renting? No problem! You can still customize your walls with removable stick-on wallpaper!

3. Wainscoting

If you want to look subtly expensive, then Wainscoting is a great route. Adding geometric elements with trim gives your walls texture and interest without complications. They’re especially great for stairways or hallways since they don’t occupy any floor space.

Why you’ll love it:

  • Few tools required
  • Materials are relatively inexpensive
  • Customizable dimensions for your space

Don’t want to buy a table saw for the project? Measure ahead of time, then have the pieces cut at the hardware store.

4. Mirrors

Mirrors are genius design elements. Playing with the style of the frame and the shape of the mirror gives you a lot of room to add personality to your walls, but the best part is that they can make any space feel bigger and brighter.

Why you’ll love it:

  • Fits available wall space– big or small!
  • Makes any space look larger by reflecting light
  • No special tools or skills required

Don’t have a lot of wall space? Then try finding small mirrors and hang them as a collection– art over function.

5. Gallery Wall

Even with a lot of doors, most hallways have a stretch where you can stash a mini-gallery wall. Class it up with sconces or track lighting, and then you’ve got a casual museum experience.

Why you’ll love it:

  • Easy to refresh
  • Frames provide a second level of design
  • Easy to customize and install

Switching out art with the seasons will add intention to your design and help your space reflect your mood.

6. Lighting

Play with the lighting of your hallway to take away the gloom of a confined, windowless space. This designer used a vintage pendant in the main hall with a complimentary sconce to create a cozy nook. These simple touches take the color palette and existing decor to round out “French countryside” vibes.

Why you’ll love it:

  • Updating builder-grade installs immediately elevates the space
  • Replacing existing fixtures doesn’t require professional skill
  • LEDs light baseboards for nighttime vision and a luxury feel

Did you know that LEDs and sconces can come with a plug? No hard-wiring required!

7. Console Table

Console tables solve so many interior design headaches. These narrow tables match any style while providing a catch-all for keys, showing off decor and collectibles, and more. Finally, try adding a lamp for a finished look.

Why you’ll love it:

  • Thin enough to leave walking space
  • Provides storage or decor space
  • Layer with art or mirrors above for an Instagram worthy configuration

Try flipping a thrift find to manage costs– a little TLC can give you a unique piece for a fraction of the price.

8. Rugs

Rugs are an excellent design option, even if you already have carpeted floors. They add texture, color, and pattern to your space. They can make the hall appear larger and protect the flooring underneath them! Get an extra high pile for a cloudlike experience on bare feet.

Why you’ll love it:

  • Easily fit any hall without taking up needed space
  • Switch out seasonally– no long term commitment
  • Find options on any budget!

Have you been itching to take a risk with color and pattern but can’t commit? Rugs seem to be an exception to the rules, so go for it!

9. Seating

Benches, chairs, or stools– a place to sit makes all the difference. Seating adds excellent functionality to your entry hall and offers a new design element at the same time. You can layer it with decor, position it under shelves or mirrors for layering, or even have it double as storage.

Why you’ll love it:

  • Combines design with function– get space for putting on socks or shoes
  • Layer with pillows or blankets for added texture
  • Use an armchair or stool in corners if there isn’t room in the walkway

Use the material of your seating for an unexpected surprise– metal in a soft space, velvet in a minimalist zone, or wood in an industrial realm.

10. Shelves

Great design is all about layering different elements. Floating shelves provide a place for new decor without taking up valuable walking space. You can play with the shape of your shelves for added interest!

Why you’ll love it:

  • From planks to grids to honeycombs – you can customize your shelves any way you like them
  • Need very few tools to hang them
  • Try corner shelving for tight spaces

Can’t find what you like? Try your hand with a TikTok or Pinterest-inspired DIY project!

———————————-

Having trouble choosing what to highlight in your redesign? The dedicated experts at One Stop Lighting can help you pick the perfect, show-stopping light fixtures for your design. Contact us today to get started on your grandmillennial refresh!

How to Fix a Noisy Ceiling Fan

Ceiling fans can change your life – or at the very least your outlook on life – with just a flip of the switch on a hot, stuffy, muggy day. There’s something magical about the way they can change the entire way a room feels, making it comfortable in seconds. 

But what happens when this miracle-worker of a ceiling fixture starts affecting the ambiance in ways it shouldn’t? A noisy, squeaky ceiling fan will make the room it’s in unbearable no matter the temperature. If your noisy ceiling fan is making you miserable, it might be easier to fix than you realize. With just a little investigation and willingness to tinker, you could be on your way to cooler days ahead. 

There are a number of reasons your fan may be making more noise than it should – we’ll go over some of the most common issues and what you can do to bring back the peace and quiet.

1. Problem: Dirt

Just like every other surface of your home, your ceiling fan collects dust over time. This is especially true if your fan sits idle over the winter months, but even a fan that’s on 24/7 will get dirty over time. 

Take a damp rag and wipe down your ceiling fan, starting from the top. Be sure to wipe all sides and edges of the blades. If dirt was the culprit, you’ll notice right away that your fan is quieter once you’re done. 

2. Problem: Damaged Blades

Over time, some fan blades may warp. This is especially true for fans that have blades made of cheap composite materials, fans in humid environments, and extra-wide fans. Look at each blade from the side – each blade should be tilted at the same angle and lay flat. If you find a blade that is bent or wavy, it could be throwing off the balance of your fan, causing it to wobble.

If you can, carefully bend the blade back into shape. If it’s not fixable, you may be able to order a replacement blade from the manufacturer. 

3. Problem: Loose Parts

When your ceiling fan is in use there are a lot of moving parts, but if a part that shouldn’t be moving has come loose, you’ll hear a rattling sound. Thoroughly check your fan for loose screws. Common pieces that come loose include the canopy (the piece against the ceiling), the light kit (some fans may not have lights), and the fan blades.

Using a screwdriver, carefully tighten each screw you can find. Be careful not to over-tighten any screws, as it could damage your fan. If your fan has parts that snap into place, like a light cover, make sure those parts are seated properly. 

If you’ve checked all of the above and your fan still seems to be rattling or unstable, you may need to remove the canopy and double-check that the mounting screws attaching your fan to the ceiling are secure.

4. Problem: Grinding in the Motor

If the simple fixes above don’t resolve your noisy fan woes, it’s possible that the motor in your fan is running without sufficient oil. Ceiling fan motors and bearings need lubricant to run smoothly – without it, you may notice a sound that’s more like a buzz than a rattle. Each ceiling fan has different requirements for the proper way to add oil to the motor. We recommend checking your manufacturer’s user manual for specific instructions. 

If you’re not comfortable with taking your fan apart to get to the motor, this task might be a good place to bring in a professional.

Turning on your ceiling fan on a hot day should be a dream come true, not your worst nightmare. The good news is – most noisy ceiling fans can be fixed with nothing more than a thorough cleaning and a checkup with a screwdriver. In less than an hour you can be back to enjoying a blissful breeze in the comfort of your home.

If your fan is still making noise after you’ve checked for dirt, loose parts, and damaged blades, and oiled the motor, it might be time for a new, quality ceiling fan that can keep you cool for years to come. 

Before you go out and buy the first fan you see – stop by our showroom and ask around. Our lighting experts can help you find what you’re looking for, and we guarantee that our fans won’t start squeaking at the first sign of a heatwave!

  • « Previous Page
  • 1
  • 2
  • 3

Recent Posts

  • Improve Your Focus at Work with Light
  • Concentration Hacks for Brain Fog
  • Improve Your Focus at Work With These 3 Types of Light
  • Tips for Good Sleep: It’s not About Counting Sheep
  • Which Forms of Light Cause Long-Term Damage to Your Eyesight?

Categories

  • 2020
  • 2023
  • Accent Lighting
  • Bathroom Lights
  • Bedroom Lighting
  • Bulbs
  • Buying Guides
  • Ceiling Fans
  • Ceiling Fans
  • Ceiling Lights
  • Ceilings Lights
  • Chandeliers
  • Decor & Home Accents
  • Dining Room
  • General Lighting Tips
  • Healthy Lighting
  • Holiday
  • How to
  • Informational
  • Kitchen Lighting
  • Lamps
  • LED
  • LED Lights
  • Life & Style
  • Light Bulbs
  • Lighting Types
  • Mirrors
  • Outdoor
  • Outdoor Lights
  • Recessed Lighting
  • Safety
  • Sleep
  • Smart Lights
  • Styles & Trends
  • Styles and Trends
  • Wall Lights
  • Wellness & Safety

One Stop Lighting

Copyright © 2025 One Stop Lighting